
Last Updated on September 7, 2023 by Pro Handyman Australia – Editorial Team
Rainwater harvesting isn’t solely about placing a tank in your backyard. The intricacies of setting up an effective collection system demand a broader perspective, encompassing various factors to ensure longevity and seamless functionality.
Choosing the Right Rainwater Tank
The market offers an extensive range of rainwater tanks, each differing in size, shape, and color. Beyond aesthetics, these tanks are crafted from diverse materials tailored to meet unique needs and preferences. So, how does one navigate through these choices and pinpoint the ideal tank?
To build a dependable and low-maintenance rainwater harvesting system, several essential components must come together harmoniously. It’s crucial to delve into aspects such as the ideal location for your tank, its optimal size, the installation process, the choice of tank materials, effective water collection methods, and how best to utilize the harvested water. By giving due attention to these elements, you’re paving the way for a sustainable and efficient rainwater collection system.
Choosing the Perfect Location, Size, and Shape for Your Rainwater Tank
1. Factors Influencing Tank Placement
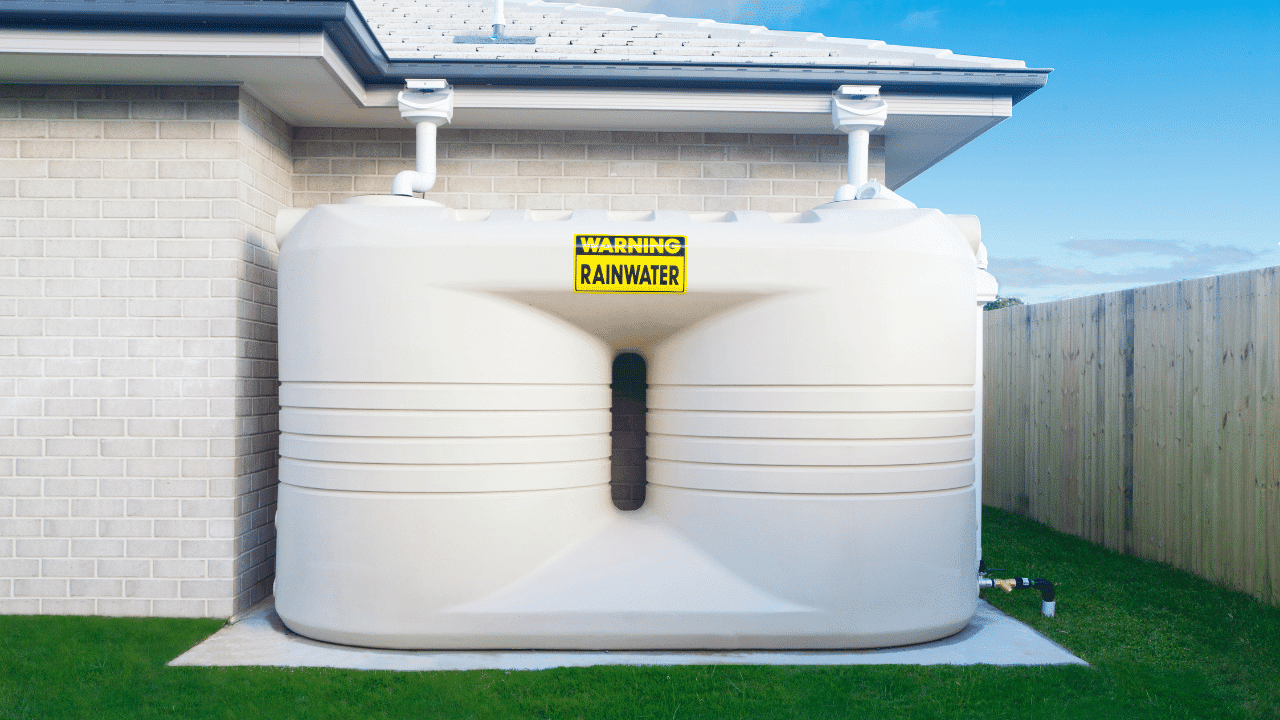
When deciding on a location for your rainwater tank, several considerations come into play. The site you select directly affects the tank’s size, shape, and possibly its color—especially if the aim is to harmonize it with surrounding vegetation or structures.
2. Proximity to Structures
Positioning your tank close to a house or shed streamlines water collection. This arrangement minimizes pipe lengths, reducing complexity and cost. Conversely, situating the tank farther from the main structure can make the plumbing setup more intricate and pricier. Additionally, if your system integrates a pump, ensure that the tank has access to power.
3. Maintenance Accessibility
Routine upkeep is vital for your tank’s longevity. You’ll occasionally need to clear out leaves and debris that collect behind the tank. Similarly, filters and first-flush diverters attached to the tank require periodic cleaning. When choosing a site, think long-term, factoring in ease of access for such tasks.
4. Pump and Equipment Placement
If your system includes a pump and other related equipment, ideally, these should be placed near the tank. However, some might prefer a straightforward approach: a tap on the tank to fill watering cans or connect to a slow-drip irrigation system. Leveraging gravity can be beneficial. Remember, if you’re not using a pump, situating your tank at a higher elevation relative to the point of use can enhance water pressure.
5. Climate Considerations
In warmer regions, the tank’s location becomes even more critical. Positioning it in a shaded area can curtail water evaporation and mitigate bacterial growth. If a naturally shaded spot is elusive, create one. Planting a fast-growing shrub on the sun-exposed side of the tank can make a significant difference. Many Australian native shrubs serve this purpose well, providing quick growth and shade. A trip to your local nursery can help identify the right fit for your region.
6. City Living and Space Constraints
Urban environments often present space limitations. Consequently, the available space frequently dictates the tank’s dimensions and form. But if you’re fortunate enough to have ample space, your tank’s size should be determined by three primary factors: your water consumption, roof collection area, and the region’s average annual rainfall. Calculating the optimal size may seem daunting.
7. Underground Tanks: A Solution for Limited Space
When above-ground space is constrained, especially in high-density areas, underground tanks can emerge as a practical alternative. These tanks come in two primary materials: polyethylene and concrete. Concrete versions are frequently cast in-situ and internally reinforced, allowing them to bear significant weight. This feature makes them ideal for placement beneath driveways. Similarly, some underground poly tanks are robustly reinforced to handle considerable loads. Integrating these tanks is most convenient during a new construction or significant groundwork like overhauling a driveway or setting a foundation for a garage.
8. Bladder Tanks for Elevated Structures
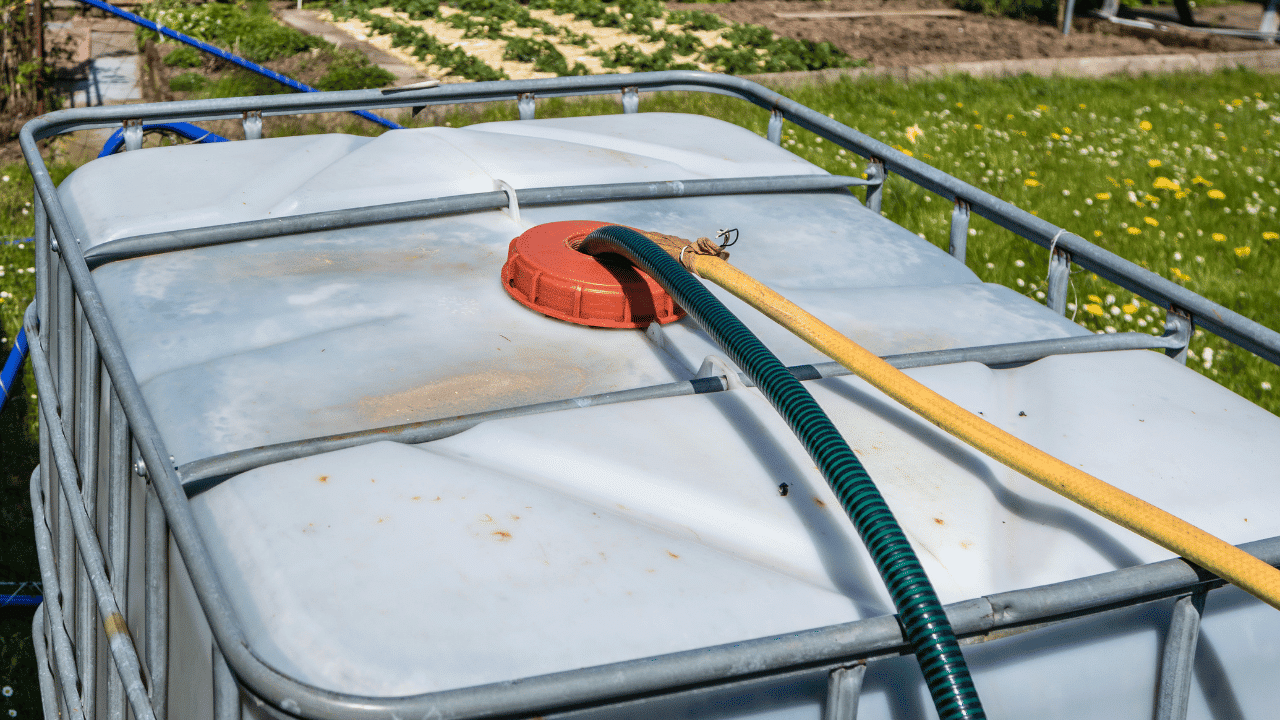
If your home is perched on stumps or if there’s a post-supported deck, bladder tanks could be a suitable choice. A bladder tank consists of a flexible rubber or plastic bladder encased within a metal frame. As water fills up the bladder, it expands to its full capacity. However, bladder tanks may pose maintenance challenges, especially if internal access is required for periodic cleaning.
9. From Roof to Tank: Understanding the Flow
An essential aspect to consider is the water’s journey from your roof to the tank. If the tank’s location is distant from the collection gutters, you might require a ‘wet’ system. This setup can increase the overall cost and complexity of your rainwater collection mechanism. For a deeper dive into this, reference the section on ‘Wet vs dry systems’.
10. Tank Placement and Material Longevity
Where you place your tank can have long-term implications on the durability of its materials. A shaded location is optimal, serving dual purposes: it maintains a lower water temperature, minimizing evaporation, and prolongs the life of certain materials like plastics and fibreglass, which can degrade faster under direct sunlight.
11. Variety in Tank Shapes
Rainwater tanks come in diverse shapes to cater to varied spatial requirements. While round tanks are prevalent, they are available in both tall and short forms. There are also oval tanks, rectangular ones, slimline designs for tight spots, bladder tanks suitable for beneath the floor, and even modular systems that can be tailored into unique shapes to fit unconventional spaces.
12. Space Optimization with Tank Shapes
It’s vital to understand that the shape of a tank can influence its storage capacity in a given space. A rectangular tank will typically hold more water than its round or oval counterparts. For instance, in a 2×2 meter area, a two-meter-high rectangular tank can store up to 8000 litres of water. In contrast, a circular tank of the same height can contain only 6280 litres.
Choosing the Right Tank for Your Needs
1. Factors Influencing Tank Selection
Selecting the right tank is not a one-size-fits-all approach. While all tanks serve the primary purpose of storing water safely, your ideal choice hinges on various factors. Consider the water capacity you need, the allocated space, your budget, and accessibility considerations. Once these parameters are clear, it becomes easier to pinpoint the optimal size, shape, and material. It’s vital to prioritize your needs. Avoid opting for a tank just because it’s on a special offer, especially if it doesn’t align with your specific requirements.
2. Ensuring a Sturdy Foundation
Regardless of your tank’s location, a robust foundation is paramount for above-ground tanks. It’s important to remember that every 1000 litres of water weighs a tonne. A tank filled to capacity, if not well-supported, can shift or tilt, leading to potential hazards for people, animals, and nearby structures.
3. Preparing the Tank Site
One popular method for site preparation involves embedding a border in the soil, slightly larger than the tank’s footprint. After ensuring it’s level, it’s often finished with sand, creating a self-levelling base that distributes the tank’s weight uniformly. However, this method may fall short if the soil beneath has inconsistent density or contains gaps.
It’s worth noting that sand, over prolonged periods, might erode, jeopardizing the tank’s stability. For instance, if the tank’s inlet screens aren’t maintained, the overflow could wash away the sand base. Furthermore, tanks on unstable ground, especially taller, slender designs, risk tilting. Unless you’re confident about your soil’s stability, it’s advisable to opt for more robust foundation options, like concrete slabs or attaching the tank to a stable structure.
What to Consider when Choosing your Tank Material
1. Common Materials Overview
When it comes to rainwater tanks, there are primarily five materials you’ll encounter: plastic, sheet steel (whether that’s Aquaplate Colorbond or galvanized), stainless steel, concrete, and fibreglass.
2. Aesthetic Considerations
For those who prioritize visual appeal, the choice of tank material will largely depend on personal aesthetics and how the tank fits into its surroundings. If integration and blending with the environment are essential, both Colorbond and poly tanks are favorable options due to their vast array of colors and designs. On the other hand, for those aiming to make a modern, striking statement, stainless steel tanks offer a sleek appearance, especially if paired with properties that feature similar cladding.
3. Material Durability and Repairability
The longevity and maintenance of a tank can be significantly influenced by its material. Specific environments, like coastal zones notorious for their saltwater sprays, pose challenges. However, all tank materials can thrive in such zones with proper installation and care. Nevertheless, certain precautions are vital. For instance, leaving objects that trap saltwater against galvanized tanks can speed up corrosion. Therefore, ensuring the tank’s vicinity remains clear is crucial. Notably, plastic, fibreglass, intact Colorbond, and grade 316 stainless steel tanks show considerable resistance to saltwater damage.
4. Dealing with External Damage
Rainwater tanks, given their size, are susceptible to various external damages, be it from vehicles, ladders, or even falling debris. Even minor incidents, such as children hurling stones, can cause notable harm, particularly to steel tanks. However, minor damages, when detected early, are typically repairable. Tanks with a separate flexible liner, be it rubber or plastic, have an added advantage. These liners can flex when impacted, reducing the chances of damage.
5. Individual Material Analysis
Each tank material presents its unique set of pros and cons. A detailed examination of each can help in making an informed decision.
Understanding Tank Materials
1. Plastic Tanks: Polyethylene & Polypropylene
Properties and Maintenance
One of the most prevalent plastic tanks is made from polyethylene, commonly referred to as ‘poly’. These tanks exhibit strong resistance to damage from saline water, making them an ideal choice for those frequently filling their tanks from sources like bores or dams. While plastic tanks can handle minor impacts due to their resilience, sharp objects or substantial impacts may puncture or crack them.
Repair and Durability
Repairs for poly tanks can typically be done by a professional in plastic fabrication. Notably, adhesive compounds might find it challenging to bond with polyethylene. However, suitable sealants such as Scotch-Weld DP8010 or DP8010NS can aid in minor repairs. Over time, poly tanks will experience some degradation due to sun exposure, despite containing UV inhibitors.
Environmental Impact
A notable concern with poly tanks is their end-of-life disposition. Their degradation might limit recycling possibilities, often leading them to landfills, which is concerning given their size. Moreover, plastic tanks surprisingly possess significant embodied energy due to their thick walls and their petroleum-based composition.
Alternative Materials
Polypropylene is another material for ‘poly’ tanks, sharing many properties with polyethylene but tending to be more brittle. Furthermore, some bladder tanks employ PVC bladders, which can potentially release harmful plasticisers. If using such a tank for drinking water, ensure it’s designated as potable.
2. Steel Tanks: Aquaplate and Galvanised
Composition and Durability
Aquaplate, a specialized type of Colorbond sheet, is thin steel featuring a Colorbond color coating externally and a waterproof lining internally to resist corrosion. Conversely, galvanized tanks are protected with a dual-sided zinc coating. Aquaplate tanks are notably sturdy, lasting anywhere from 25 to 40 years, contingent on proper maintenance. Galvanized tanks also promise longevity, although using them for more corrosive waters, like bore water, may not be advisable without occasional treatments.
Welding and Maintenance
Welding Aquaplate or galvanized tanks can endanger their anti-corrosion layer. In cases where welding is unavoidable, the compromised coating should be diligently restored. When considering soldering for galvanized tanks, opt for lead-free solders. More aggressive solders will necessitate internal tank resealing.
Disposal and Environmental Considerations
Metal tanks, upon reaching their lifespan’s end, can pose challenges for disposal. Their corroded state may render them unappealing to scrap metal dealers. However, if these tanks find their way to landfills, they’re comparatively innocuous. Still, painted or Colorbond tanks, with their plastic coatings, can contribute to microplastic pollution. The inherent embodied energy in steel is also notable, though it’s marginally less than its stainless steel counterpart.
3. Stainless Steel Tanks: Strength and Sustainability
Attributes and Repairability
Known for their resilience and longevity, stainless steel tanks come in varied sizes ranging from small modular designs for urban environments to larger corrugated versions that resemble shiny corrugated iron. An evident merit of stainless steel tanks is their straightforward repair process. Skilled fabricators can easily mend minor holes by welding and address larger damages using patches of new stainless steel. Furthermore, the repairs typically require no additional treatments due to the steel’s inherent corrosion resistance. Waterproof sealants can also be utilized for repairs.
Recycling and Environmental Impact
When it comes to disposal, stainless steel tanks rarely corrode as coated steel tanks do, making them attractive to scrap metal dealers. The recyclable nature of stainless steel further adds to its appeal. Notably, while stainless steel possesses considerable embodied energy, its longevity and recyclability tend to counterbalance this aspect.
4. Concrete Tanks: Durability with a Caveat
Characteristics and Maintenance
Concrete tanks are renowned for their sturdiness. However, a common issue is their tendency to perspire unless equipped with a rubber or plastic liner. Over time, it’s not rare to observe white salt-like residues on the tank’s exterior. While many concrete tanks are located underground, shielding them from potential damages, those placed above ground may be challenging to repair, contingent on the damage severity.
Disposal and Environmental Footprint
In terms of disposal, concrete tanks are relatively harmless. Nonetheless, given the significant volume of materials they encompass, some challenges arise. Although specific companies offer concrete recycling, it’s not universally accessible. Additionally, transporting an aging and deteriorating tank may necessitate heavy machinery, leading to potential high removal costs. The manufacturing process for cement, combined with the tank’s substantial material volume, results in concrete tanks having higher embodied energy in comparison to their steel or plastic counterparts.
5. Fibreglass Tanks: Resilience with Environmental Concerns
Strength and Repair
Fibreglass tanks are lauded for their robustness, impact resistance, and repairability. Professionals adept in working with fibreglass can conveniently rectify any damages.
Environmental Implications and Disposal
A significant downside is that fibreglass tanks, being composite materials, aren’t typically recyclable and are destined for landfills. As these tanks degrade in landfills, they release considerable amounts of polyester resin and other harmful substances, including the catalyst essential for resin setting. This necessitates fibreglass tanks designed for potable water storage to incorporate liners or food-grade internal coatings to ensure safety.
Understanding Wet and Dry Systems
1. The Basics of Dry Systems
A dry system involves water flowing downwards from the gutter via a sloping pipe, which directs it to the tank’s top. Post rainfall, the pipe drains out its contents, leaving it “dry.” This system is apt for scenarios where the tank and the guttering are on the same side of a dwelling and in proximity. Typically, the pipe’s length in such configurations is short, running alongside the residence.
2. Wet Systems Explored
In a wet system, certain pipework sections, connecting the guttering and the tank, lie beneath the tank’s top, often buried underground. Such a system becomes imperative when tanks and gutters are on opposite sides of a building. Reasons can range from obstructions like driveways to the need for multiple downpipes from diverse house sides to converge into a singular tank. When tanks aren’t near the home, wet systems are generally chosen for aesthetic reasons and to preclude the suspension of elongated pipe sections between the building and the tank.
However, wet systems have their own set of challenges:
- Potential breeding grounds for pests like mosquitoes within the pipes.
- The need to drain not just the initial water flow from the roof, but also the residual water within the pipe.
Mesh screens are commonly used as a remedy for the former, whereas in-ground first-flush devices can address both concerns. These devices, buried alongside the pipework, have drainage outlets positioned lower than the tank and the pipes. Effectively, they can transition a wet system into a dry one by ensuring pipes are drained post-rainfall.
Nonetheless, for in-ground first-flush diverters to be effective, they must be designed to drain the pipes of a wet system completely. They might face challenges like blocked drippers, retained debris, and dependency on sloping grounds. They can also affect the overall rainwater yield. Beyond these concerns, wet systems inherently have a more intricate design than dry ones and are pricier due to the necessity of burying the pipework.
Tank Elevation Considerations
The height of a tank, especially in comparison to the gutter’s elevation, is a critical aspect. Intense rainfall requires a minimum “head” (the height disparity between the gutter’s top or the leaf guard/rain head and the tank) to facilitate sufficient water flow through the pipes. This ensures that water doesn’t accumulate in the pipes, leading to overflows at the gutters. Factors determining the required head include the roof area being serviced by the pipes, pipe diameter, and the bends within the pipe, which might restrict water flow. If it’s challenging to maintain an adequate head height, you might have to consider partially burying the tank or opting for several lower-height tanks. Engaging a plumber for insights before finalizing a tank choice can prevent potential issues.
Conclusion
Making the choice to invest in a rainwater tank is both an environmentally-conscious and cost-effective decision. As we’ve journeyed through this comprehensive buyer’s guide, it becomes clear that the options available in the market are as varied as the needs of the individual homeowner. Whether it’s understanding the intricacies of wet and dry systems, gauging the importance of tank height, or harnessing advanced features like rainwater changeover systems and water-level gauges, every aspect plays a pivotal role in optimizing water usage and ensuring sustainability. As you move forward in your quest to find the perfect rainwater tank, remember that it’s not just about storing rain; it’s about harnessing nature’s gift in the most efficient manner possible. Choose wisely, and your tank will not only serve your household’s needs but also contribute to a greener planet.