
Last Updated on December 1, 2023 by Pro Handyman Australia – Editorial Team
A circular saw, with its high-powered blade rotation, is an essential tool for DIY enthusiasts, especially when deciding between a table saw vs miter saw for specific projects. To use a circular saw effectively, one must first understand its main components. Once familiarized, operating the saw becomes a straightforward process.
Understanding the Circular Saw Anatomy
Before delving into your next project, it’s crucial to familiarize yourself with the various components of the circular saw, along with some key circular saw facts. Here’s a breakdown:
Motor: The core of the circular saw, usually housed within a protective exterior. Modern models, especially the brushless ones, are designed for low maintenance and longevity.
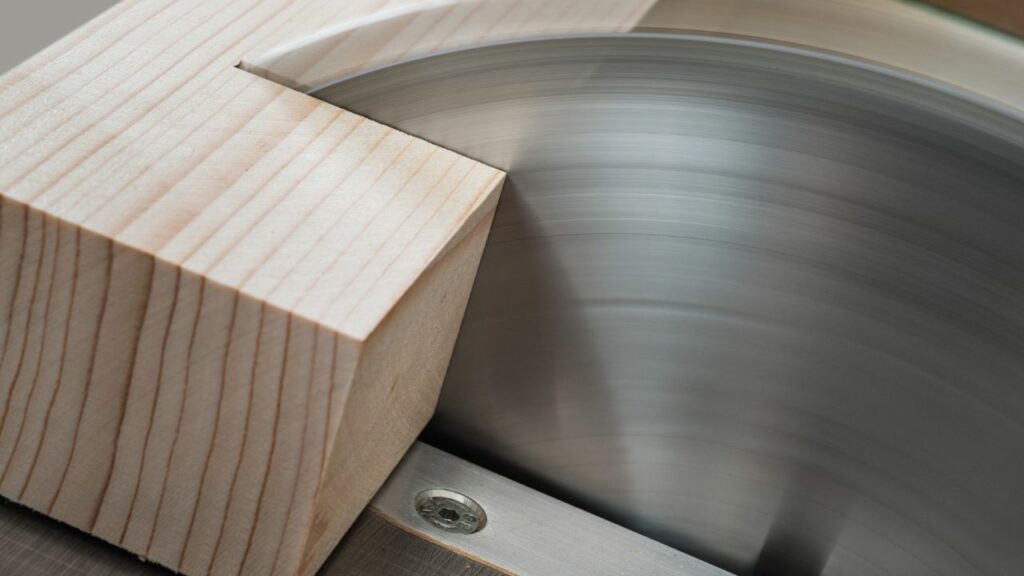
Blade: The defining feature, this round blade, equipped with sharp teeth, makes precise cuts as it rotates at high speeds. Its efficiency is determined by the power of the motor.
Blade Guard: Safety should always be paramount. Recognizing the potential hazards of an exposed rotating blade, designers have equipped the saw with a spring-loaded retractable blade guard. This essential feature safeguards both users and nearby surfaces from accidental cuts. During the cutting process, this guard is designed to retract automatically.
Trigger Mechanism: The circular saw’s operation is made simple with its on-off trigger. Unlike some tools, these saws don’t offer adjustable speeds. Activating the trigger will instantly set the blade into full-speed motion.
Safety Features: Some models are designed with thumb-activated safety switches, offering an additional layer of protection against unintended startups.
Plate/Shoe: Resting directly on the material, the plate, commonly referred to as the shoe, plays a pivotal role. Usually constructed from aluminum, steel, or die-cast materials, it provides stability during cuts. Additionally, its angle can be fine-tuned to achieve bevel cuts.
Bevel and Depth Adjustments: Depending on your saw model, the bevel adjustment might be situated either at the front or the rear. This feature, usually in the form of knobs or levers, allows users to alter the plate’s angle relative to the blade. While it may not guarantee pinpoint accuracy, it’s sufficiently precise for tasks like framing. Furthermore, the blade’s depth can be modified using the depth adjustment, typically located at the saw’s rear. This flexibility empowers users to perform a myriad of tasks, from surface scoring to cutting through dense lumber.
By understanding these core components, anyone can begin their journey with the circular saw. As you delve deeper, you’ll learn more about its various features and how to utilize them for different cutting tasks. But always remember, no matter how proficient you become, safety should always be the top priority.
Exploring the Various Types of Circular Saws
Circular saws, like many power tools, come in a range of designs tailored to specific tasks. While their overarching function is to cut, each type boasts unique advantages and potential drawbacks.
Sidewinder Circular Saws
Sidewinder circular saws feature their electric motors in alignment with the blade. This configuration allows the blade to mount directly onto the motor’s output shaft. A notable feature of sidewinders is their compact and lightweight design, especially when juxtaposed with worm drive models. The blades on these saws achieve impressively high speeds, and they are largely low-maintenance and user-friendly. However, when it comes to torque, they fall short compared to worm drives. Most cordless circular saws in the market are sidewinders.
Worm Drive Circular Saws
For those tasked with cutting through dense lumber or timbers, such as 4x4s or 6x6s, the worm drive circular saw is the ideal choice. In these saws, the motors are placed in line with the handle and are connected to the blade through a set of gears. This design amplifies torque but also results in an increase in the saw’s overall size and weight. Regular maintenance, including routine oiling and cleaning, is essential for preserving their performance.
Compact Circular Saws
In scenarios where a full-size saw may prove excessive or cumbersome, compact circular saws emerge as the preferred alternative. With blade sizes varying between 4 inches and 5-3/8 inches, these saws are predominantly crafted from polymer plastics. This material choice ensures they remain both lightweight and resilient.
Track Saws

Achieving flawlessly straight cuts with a conventional circular saw is feasible, but track saws simplify this task and minimize potential errors. These specialized saws come equipped with elongated track guides that either lay on or are clamped to the material. As the saw glides along these tracks, it ensures straight, precise cuts. Although most track saws might not match the cutting depth of standard circular saws, they often boast superior bevel cutting accuracy. Surprisingly, many track saws are sold without tracks, necessitating an additional purchase.
Prioritizing Safety with Circular Saws
Though circular saws offer unmatched convenience, they can be daunting for beginners. To ensure a safe and efficient experience, consider the following precautions:
- Circular saws produce significant noise and can eject wood chips during operation. It’s essential to wear appropriate personal protective equipment, such as hearing protectors and safety goggles. Also, refrain from donning loose clothing when handling these tools.
- Always inspect your workspace to ensure that no obstructions, tools, or power cords lie beneath the saw blade’s path.
- Never tamper with or remove the blade guard. If the guard obstructs your cut, manually elevate the guard using its handle before activating the blade. Once the cut is complete, return the guard to its original position.

After completing a cut, maintain your grip on the saw until the blade comes to a full stop. Releasing it prematurely might lead to the blade jamming and potentially rebounding towards the user.
- Sharp blades not only ensure a clean cut but also enhance safety. Blades that have become dull or are caked in residue demand extra force, escalating the risk factor. Maintain your blades to ensure they slice through materials effortlessly.
- Prior to making any adjustments to the blade’s depth or its bevel angle, disconnect the saw from its power source.
- Before using the saw, conduct a thorough inspection. Assess the condition of the cord, plug, trigger mechanism, safety switch, and guard. Also, confirm that the blade is firmly affixed in place after ensuring the saw is unplugged or its battery is detached.
Video on How to Use a Circular Saw
This video is designed to guide beginners and refresh experts on the safe and efficient use of circular saws. Dive deep into the anatomy of the saw, explore various types, and master techniques for precise cutting. Plus, we’ll share crucial maintenance tips to ensure longevity and optimal performance of your tool. Whether you’re attempting cross cuts, rip cuts, or just curious about general safety measures, we’ve got you covered. Hit play, and let’s get sawing!
Setting Up and Preparing Your Circular Saw
While circular saws are relatively straightforward to set up, ensuring their precision and accuracy involves a few key steps. Here’s how to get started:
Preparing the Saw
- Blade Positioning: Begin by positioning the circular saw atop the material intended for cutting, ensuring the blade overhangs the edge and the plate is flush against the surface.
- Adjusting Blade Depth: Loosen the saw’s depth adjustment. The blade’s depth should be set to approximately 1/4 inch deeper than the thickness of the material. Once adjusted, secure the depth lever.
- Calibrating for Square Cuts: For cuts that are perfectly perpendicular, it’s vital to calibrate the blade to a true 90-degree angle. First, ensure the saw is disconnected from any power source for safety. Flip it over, retract the blade guard, and align a speed square or framing square against both the blade and the plate’s bottom. If the alignment isn’t perfect, modify the bevel settings and reposition the plate accordingly.
Setting Up the Work Surface
Preparation of the Workspace: Achieving precise rip cuts demands a stable foundation. Given the potentially cumbersome nature of the process, the selection of a work surface becomes even more crucial. Arranging a set of sacrificial 2x4s over a flat area, like a driveway, can serve well. Alternatively, wooden sawhorses equipped with replaceable tops can also be ideal. Whatever your choice, ensure that your setup eliminates any risk of inadvertently cutting valuable materials or surfaces.
Mastering Rip Cuts with a Circular Saw
Marking and Measuring
Sketching the Cut: Circular saws inherently don’t deliver precise cuts in the same way as miter saws. Hence, you’ll need to mark the lumber for accurate cutting. Start by marking the intended cut location, align a framing square to this mark, and draw a straight, visible line. It’s essential to verify the accuracy of this line before cutting. Additionally, when working with reclaimed wood, ensure you inspect and remove any hidden nails or screws to avoid damaging the saw blade.
Accurate Marking
Measurement and Marking: Irrespective of whether you’re working with lumber or a plywood sheet, accuracy in marking is imperative. A common and effective method involves marking both ends of the board and connecting these marks using a chalk line. After stretching it taut, a quick snap will give you a clear line to follow. However, if you don’t have a chalk line at your disposal, tools like a combination square, T-square, level, or even a straight-edged wooden or metal strip can serve as reliable alternatives.
Perfecting Cross Cuts with a Circular Saw
Cross-cutting, predominantly used for cutting framing lumber to size, is a prevalent application of the circular saw. Here’s a systematic approach to achieve precise cross-cuts:
Setting Up the Workpiece
Securing the Board: The work surface you choose should be robust and stable. Whether you’re using a pair of sawhorses, a truck bed, or a stack of lumber, make certain there’s no risk of inadvertently cutting into any other objects. It’s beneficial to stand on the board’s lengthier side for maximum control. Firmly hold the board against your work surface, using downward pressure. For added security, consider clamping the board in place.
Making the Cut
Executing the Cut: Before activating the saw, position the plate’s front on the board, aligning the blade with the previously drawn cutline. Retract the blade a tad, activate the safety switch, and then initiate the cut by pressing the trigger. Focus on the blade’s leading edge as you guide the saw along the marked line. Ensure you apply pressure only in the cutting direction to maintain the straightness of the cut. Once completed, let the off-cut piece drop, wait for the blade to cease its motion, and then place the saw down with caution.

Mastering Rip Cuts with a Circular Saw
Executing rip cuts using a circular saw can present some challenges, especially without the aid of a track. However, with the right techniques and precautions, you can confidently cut down the length of a board. Here’s your step-by-step guide:
Initiate the Cut
Cutting Alignment and Execution: Begin by positioning the plate’s front side on the board, aligning the blade with your marked line. Slightly retract the blade, engage the safety switch, and activate the saw using the trigger. With a keen eye on the blade’s leading edge, guide it along the marked line, ensuring it stays aligned throughout. Continue guiding the saw to the maximum safe distance before repositioning yourself.
Adjusting and Continuing the Cut
Shifting Your Position: Extensive rip cuts may necessitate frequent pauses to adjust your stance. It’s pivotal to remember not to release the saw until the blade halts completely. After ensuring the blade has come to a stop, adjust your position for the next section of the cut. As you prepare to resume, slightly backtrack the saw to allow for a smooth transition and reactivate the blade. Repeat this process as required until your cut is finalized.
A point to consider is the unpredictability of certain lumber types, like framing or pressure-treated wood, which may possess a wavy grain pattern. This grain can sometimes lead the blade astray. It’s advisable to handle such materials with increased care, maintaining a steady pace and a vigilant watch on the saw’s trajectory.
Pro Tip: For those still familiarizing themselves with circular saw operations, reducing the blade’s depth can prove advantageous. While this might increase friction, it also maximizes the blade’s contact surface against the wood, aiding in maintaining a straight cut. Always ensure that there’s no obstruction beneath your workpiece to prevent unintended cuts.
Hands-On Experience with Circular Saws
In the vast world of circular saws, real-world user experiences are invaluable. They not only provide genuine feedback but also shed light on the tool’s performance in real-life scenarios.

Jane’s Encounter with the Milwaukee 2830-20 Circular Saw: Jane, a DIY enthusiast, recently upgraded her workshop with the Milwaukee 2830-20 Circular Saw. She remarked, “Having used multiple saws over the years, the Milwaukee 2830-20 Circular Saw stands out. Its ergonomic design and adjustable grip made long hours seem effortless. I was particularly impressed with its smooth cuts on dense oak!”

Mike’s Review of the Ryobi P505 18 Volt Circular Saw: Mike, a professional carpenter, shared his experience with the Ryobi P505 18 Volt Circular Saw. “In my 15 years on the job, this is by far the most robust and reliable circular saw. The blade’s precision and the motor’s power are unmatched. I highly recommend the Ryobi P505 18 Volt Circular Saw for those tackling heavy-duty projects.”
These firsthand experiences underscore the importance of selecting a circular saw that aligns with individual needs and project demands.
In-Depth Circular Saw Comparisons
To provide readers with a clearer perspective, we’ve juxtaposed two top circular saw models:
| Feature | Milwaukee 2830-20 Circular Saw | Ryobi P505 18 Volt Circular Saw |
|---|---|---|
| Power (in Watts) | 1500 | 1800 |
| Weight (in lbs) | 15 | 17.5 |
| Blade Diameter (in) | 7.25 | 7.5 |
| Price (in USD) | $199 | $249 |
| Battery Life (hours) | 4 (Cordless) | N/A (Corded) |
While the Milwaukee 2830-20 Circular Saw is more lightweight and budget-friendly, ideal for hobbyists, the Ryobi P505 18 Volt Circular Saw, with its greater power and blade size, is tailored for professionals seeking precision and power in one package.
Blade Care
Sharpness is Vital: Regularly inspect the sharpness of your blades. The moment they start showing signs of dullness, either sharpen or replace them. A sharp blade not only guarantees safety but also enhances the saw’s precision.

Motor Maintenance
Attention to Brushed Motors: If you notice your saw’s power diminishing, it might be time to replace the brushes, especially in models with brushed motors. These are typically easy to replace, and sourcing them from the manufacturer ensures compatibility.
General Maintenance Tips
A well-maintained circular saw not only ensures safety but also optimizes its performance and prolongs its lifespan. Adhering to a few key maintenance practices can help you extract maximum utility from your saw:
Plate Cleaning
Ensure a Smooth Glide: Over time, the plate’s bottom may accumulate grime, which can lead to scratches on surfaces and resistance while cutting. Employ bug and tar removers, pitch removers, or other appropriate cleaning agents to maintain a pristine and smooth plate.
General Cleaning
Dust and Debris Removal: Utilize compressed air to rid the saw of any dirt and sawdust that might have settled within its components. This cleanup not only ensures smooth operation but also promotes optimal airflow, which in turn facilitates more accurate cuts.
Special Care for Worm Drive Saws
Lubrication is Key: If you own a worm drive saw, it’s crucial to periodically check its oil level. Ideally, after every three to four usages, ensure that the oil is at an adequate level. This lubrication ensures the gears function seamlessly and reduces wear and tear due to friction.
In Conclusion
Circular saws boast a multifaceted utility in the realm of power tools. Though they may not rival the precision of miter or table saws, their adaptability enables them to efficiently handle a myriad of tasks that those specialized saws undertake. By adhering to the maintenance advice provided above and possibly consulting with Perth Handyman Services for further insights, users can harness the full potential of circular saws, ensuring both safe and precise operations across various projects.