
Last Updated on December 1, 2023 by Pro Handyman Australia – Editorial Team
Achieving a straight cut with a circular saw is simpler than you might think, especially when comparing it to making decisions in the “table saw vs miter saw” debate. This article offers a concise guide on how to make precision cuts with ease, providing clarity in situations where you might be weighing the pros and cons of a table saw vs a miter saw. Let’s dive into the essential tools and types of cuts to get you started on your woodworking journey.
Getting Started: Essential Tools for Straight Cuts
- Circular Saw: The foundational tool you’ll need.
- Measuring Tape: For ensuring your cut lines are accurate.
- Pencil: To mark where you’ll be cutting.
- Cutting Guide: Choose one based on your preference from our suggestions ahead.
Basic Types of Cuts with a Circular Saw
Before mastering straight cuts, it’s crucial to familiarize yourself with the primary cut types using a circular saw:
- Cross Cut: Cutting directly across the grain, common when working on the shorter side of plywood.
- Rip Cut: Cutting parallel to the grain, ideal for the longer side of plywood.
- Miter Cut: This involves cutting across the board at a specific angle. You’ll mark an angled line on the plywood’s surface and then cut through, keeping the saw blade at a 90-degree angle.
- Bevel Cut: Here, the board is cut at an angle, but what’s different is the saw blade itself is tilted at a certain angle. This technique is often used for specific projects, like creating the top and sides of DIY tables.
With these tools and basic knowledge, you’re already on your way to making perfect straight cuts. As you continue reading, you’ll discover more advanced techniques and cuts to further enhance your woodworking skills, underpinned by essential circular saw facts.
Video on How to Cut Straight with a Circular Saw (Without a Guide)
This video breaks down the art and skill of achieving precise, straight cuts using just your circular saw and some expert techniques. From preparation to execution, we’ll cover every detail to ensure you master this skill, even without the aid of a guide. Ideal for both novices and seasoned woodworkers seeking to up their game, this guide will transform your cutting approach. So, ready your circular saw and let’s craft perfect straight cuts, guide-free!
Guidelines for Straight Cutting with Circular Saws
Marking Techniques for Accuracy
The planning phase is crucial for any cut. Begin by measuring and marking your intended cut on both sides of the plywood. It’s vital to be meticulous during this step. Even a minor error, such as marking 1/16” off on one side, can render a cut that’s straight but not square.
For added precision, consider using a drywall square. This tool ensures that your lines are perfectly square and can also help connect the marks you’ve made on the plywood’s opposite ends. For most cutting guides, marking both sides of the plywood will usually be adequate.
Kreg Rip-Cut Guide
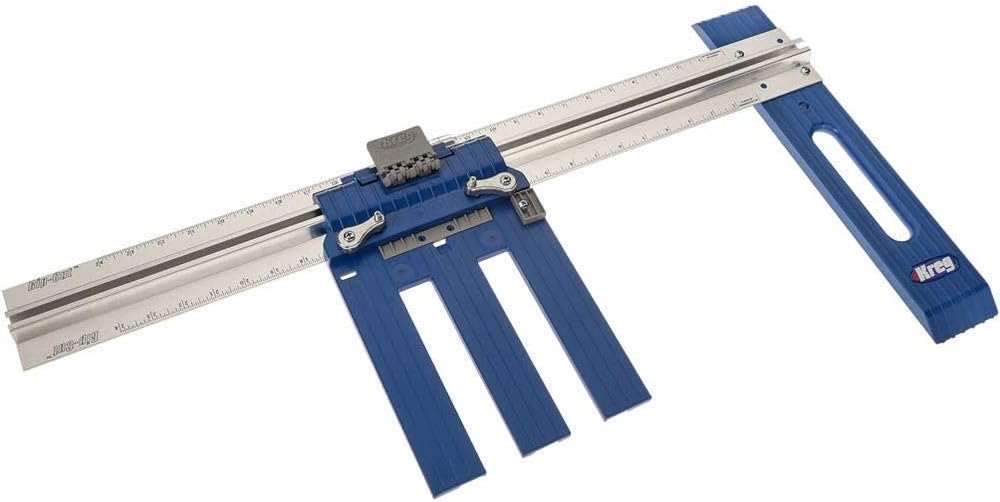
The Kreg Rip Cut guide, despite its title, is versatile and can be employed for both rip cuts and cross cuts. A notable feature is the elimination of manual marking on plywood. Instead, the built-in measuring scale is adjusted to lock your desired measurement in position.
This guide collaborates with the Kreg universal sled, commonly associated with their Accu-Cut guide. A majority of circular saws can comfortably accommodate this guide with a simple tightening of two screws.
Though the initial setup for the Rip Cut guide may be a tad intricate, subsequent usages prove straightforward and hassle-free. Once prepared, attach the sled to your circular saw and adjust the measuring scale. Ensure the guide aligns perfectly with the wood’s edge during the cutting process.
It’s worth noting that, post locking the measurement, the scale might exhibit slight movement. However, as long as there’s no lateral shift affecting the measurement, there’s no cause for alarm. The guide is designed to stabilize upon contact with plywood, ensuring an undisturbed cut.
Ideal for:
- Consistent cuts with identical measurements.
- Both cross and rip cuts.
Advantages:
- Economical among the discussed cutting guides.
- Offers unlimited cutting length.
- Eliminates the need for a measuring tape.
- Facilitates swift and precise repeated cuts.
Limitations:
- Restricted to a maximum width of 24 inches.
- Potential for increased tearout during cross cuts.
- Relies on a straight starting edge.
- Incompatible with miter or bevel cuts.
Kreg Accu-Cut Guide
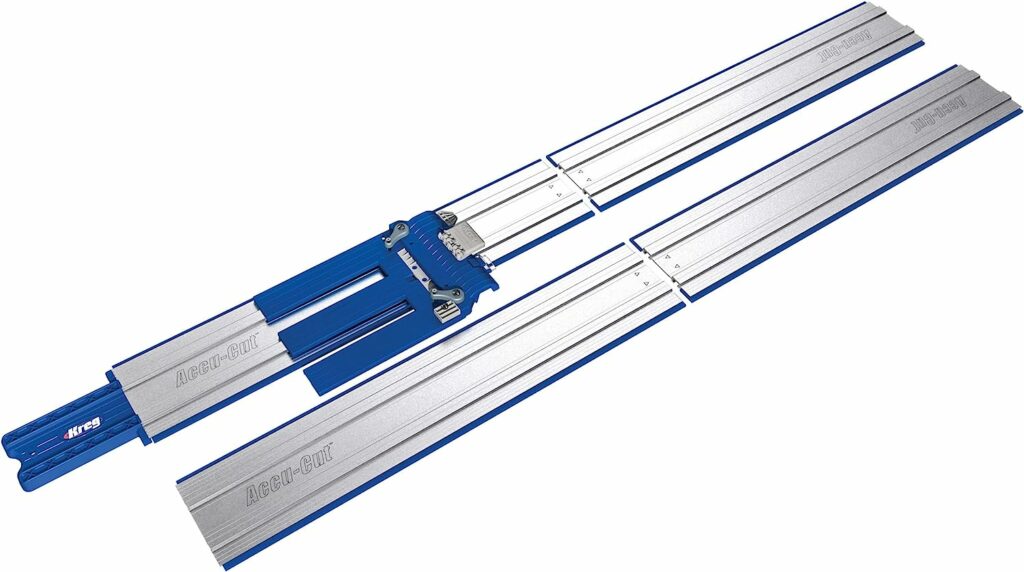
Choosing between the Rip Cut and Accu-Cut guide is a matter of personal preference. The Accu-Cut’s versatility shines with its non-slip backing. You can position the track, confident in its stability.
While some users reported occasional track movements, additional clamps are available to rectify this concern, even though many haven’t encountered this issue firsthand.
The Accu-Cut is suitable for cross cuts, rip cuts, and miter cuts, but bevel cuts are a no-go due to potential damage to the guide. Its track system seamlessly integrates with the saw, which is especially beneficial for novices, as it minimizes alignment concerns.
However, caution is urged to prevent the saw from veering off the track, as there have been instances of damage to the guide’s blue strips. A standout feature is the Accu-Cut’s anti-chip strips, which considerably reduce tearout – a unique attribute among the mentioned guides.
Though the initial setup mirrors the Rip Cut’s complexity, future operations are a breeze. Just align the Accu-Cut’s side with the plywood markings, lock the circular saw into the track, and you’re set to cut.
Ideal for:
- Cross cuts, miter cuts, and rip cuts.
Advantages:
- Built-in anti-chip strips that drastically minimize tearout.
- Elimination of clamps.
- The track system ensures error-free straight cuts.
Limitations:
- For cuts exceeding 50 inches, the XL version is necessary, which supports up to 100-inch cuts.
- Incompatible with bevel cuts.
Kreg Straight Edge Guide
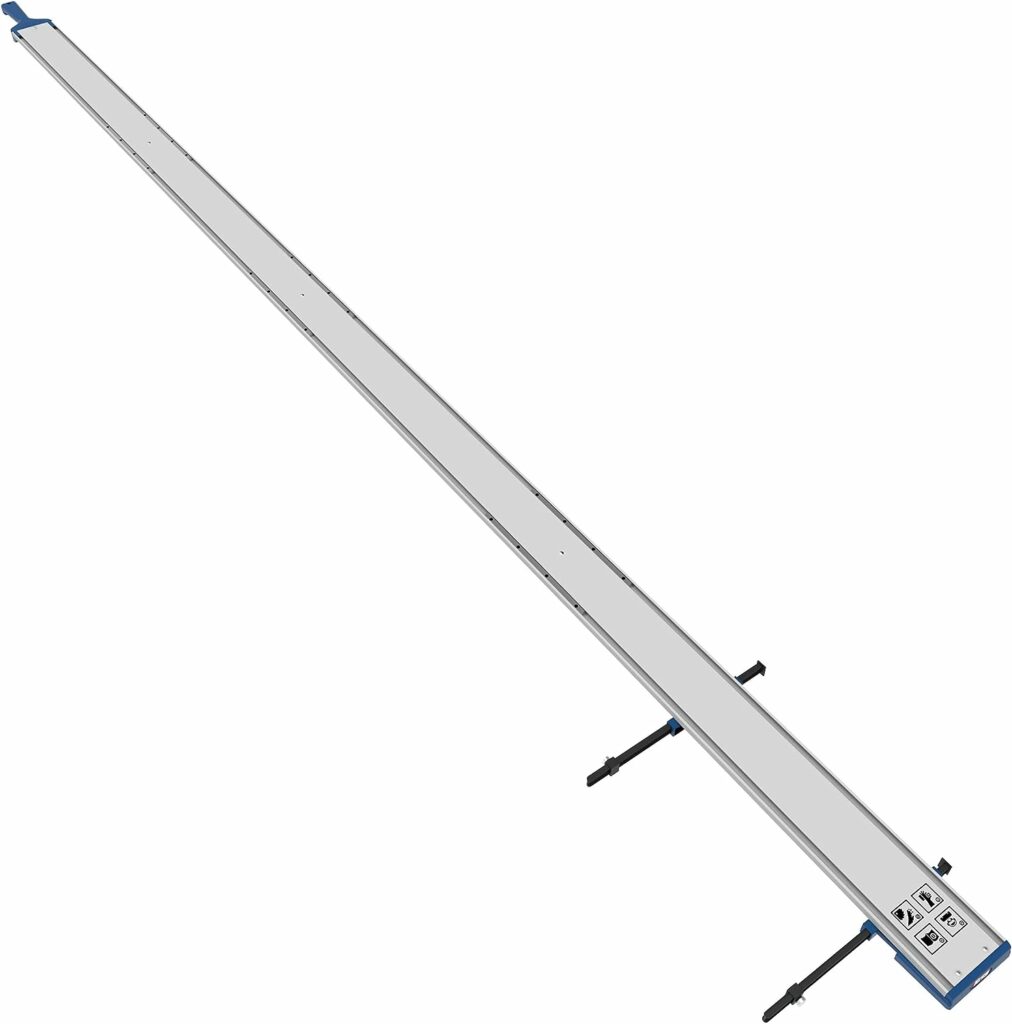
The Kreg Straight Edge Guide is one of the latest additions to the cutting guide range, and our hands-on experience with it spans over the cutting of approximately 10 plywood pieces. Here’s an in-depth review based on our use:
Remarkably, this guide boasts the simplest setup among the store-bought options discussed. Beyond its primary function with a circular saw, the guide’s versatility shines, as it can be employed with a variety of other tools.
Constructed from robust metal, the guide assures users of unwavering straightness. This sturdiness ensures a high level of confidence in achieving a straight edge during cuts. However, when using a circular saw, it’s essential to note that you won’t align the metal guide directly with the marks on your plywood. Due to the saw’s plate, adjustments are necessary to account for the distance between the saw blade and the metal plate that rests against the guide.
To aid this, the Straight Edge Guide incorporates small black indicators for setting the required distance. Once configured, there’s no recurrent need to re-measure the distance to your saw blade. These black tabs are meant to line up with your markings. After securing your markings and clamping the guide using its integrated system, retract the black indicators to clear the path for your circular saw blade. Ensure the saw plate remains aligned with the guide throughout the cut.
Ideal for:
- Primarily for rip cuts and cross cuts.
- Apt for extended bevel cuts.
Advantages:
- The metal guide’s construction is both solid and perfectly straight.
- Showcases adaptability, as it pairs well with jigsaws and certain routers, breaking the confinement of only circular saw use.
Limitations:
- Incompatibility with mitered cuts.
- Potential for increased tearout during cross cuts.
- To manage an 8-foot piece of plywood lengthwise, the XL version is essential. The standard version handles up to 48-inch wide pieces.
- A specific consideration when cutting on rigid foam insulation board is ensuring the clamped side remains off the foam board. This prevents the guide from lifting off the plywood surface. While this doesn’t pose a significant challenge, it’s a detail to remember.
Teamwork vs Solo Use
Our use of the guide has always been collaborative. With a coordinated approach, one person aligns the guide while the other secures it using the built-in clamp, proving to be efficient. However, solo operation might present challenges. The guide can inadvertently shift, especially when trying to fasten the clamp, even during collaborative use. It remains to be seen how solo usage fares, as we’ve yet to test it individually.
Utilizing Scrap Wood as a Cutting Guide

One of the initial methods many adopt is using a piece of scrap wood as a cutting guide. Not only is this approach cost-effective, but it’s also efficient for those who prefer not to invest in specialized guides.
Setting It Up:
- Identify a straight piece of wood. Ensuring the wood is straight is crucial, as the straightness of your cut will depend on it.
- Align the circular saw blade with the intended cutting line, then mark the side of the circular saw’s metal plate. If dealing with extended plywood, repeat this marking at the other end.
- Position the scrap wood along the marked line and secure it using clamps. It’s imperative to place the clamps in a way that they don’t obstruct the circular saw, especially during steep 45-degree bevel cuts.
- With everything set, align the circular saw plate with the scrap wood and execute your cut, ensuring the saw’s plate remains flush with the scrap wood throughout.
Ideal for::
- Suitable for a variety of cuts: cross cuts, rip cuts, miter cuts, and bevel cuts.
Advantages:
- Cost-effective, eliminating the need for specialized guides.
- Highly adaptable, with its efficacy determined by the straightness and length of your scrap wood.
Limitations:
- Clamping is mandatory.
- Setting up might be slightly time-consuming.
- The distance between the blade and the edge of the circular saw plate needs to be measured and accounted for with every cut.
Speed Square: Quick Guide for Smaller Cuts
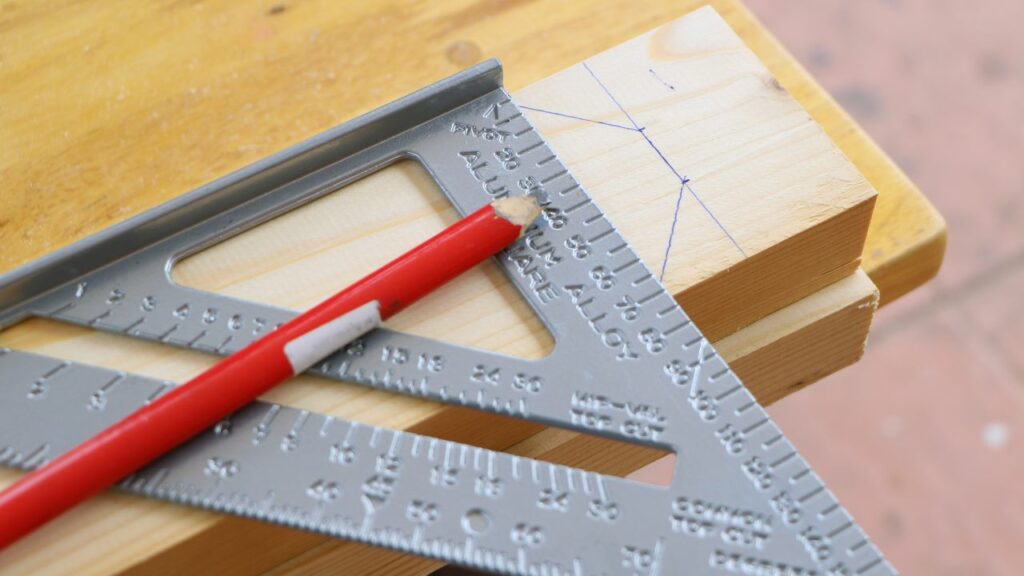
For individuals working on smaller wood pieces, a speed square can serve as a nifty guide. This tool can be held or clamped in position while making the cut. Like with the Kreg Straight Edge Guide and the scrap wood method, the speed square won’t align with the marked lines on the wood. Instead, position the speed square adjacent to the circular saw’s metal plates after aligning the saw blade with the marked lines.
Ideal for:
- Best for cuts on smaller boards, such as 4x4s and 2x6s.
- Perfect for 45-degree miter cuts on diminutive wood pieces like 2x4s.
Advantages:
- Eliminates the need for additional cutting guides.
- Offers quick setup.
Limitations:
- Risk of inadvertently shifting the speed square during cutting.
- Primarily designed for shorter cuts.
While not part of our personal repertoire, many have reportedly employed a drywall square similarly for extended plywood cuts.
User Experience with Circular Saws
When discussing the task of cutting straight with a circular saw, real-life user experiences provide invaluable insights.

John, a professional carpenter, swears by the Makita Cordless Circular Saw 18V for its precision. “The first time I used the UltraSmooth, I was amazed at how effortlessly I could maintain a straight line, even on longer cuts,” he recalls.

On the other hand, Sarah, a DIY enthusiast, shared her pleasant surprise with the BLACK+DECKER 1250W 190mm Circular Saw. “Being relatively new to woodworking, I was a bit nervous. But the BLACK+DECKER 1250W 190mm Circular Saw’s ergonomic design made the experience intuitive and, dare I say, fun!”
It’s apparent from such firsthand accounts that choosing the right model significantly impacts the ease and accuracy of straight cuts, a crucial consideration in the jigsaw vs circular saw debate.
Comparisons: Circular Saws Face-Off
To further aid our readers in making an informed choice, let’s delve into an in-depth comparison of top circular saw models:
| Model | Power (W) | Longevity (Hours) | Price ($) |
|---|---|---|---|
| Makita Cordless Circular Saw 18V | 1500 | 500 | 250 |
| BLACK+DECKER 1250W 190mm Circular Saw | 1450 | 480 | 240 |
| Bosch 18 V Cordless Circular Saw, | 1400 | 460 | 230 |
While the Makita Cordless Circular Saw 18V leads slightly in terms of power and longevity, the BLACK+DECKER 1250W 190mm Circular Saw is not far behind and offers a more competitive price point. The Bosch 18 V Cordless Circular Saw, on the other hand, provides a balance between performance and affordability.
In Summary: Unraveling the Techniques for Precise Circular Saw Cuts
The quest for achieving flawless straight cuts using a circular saw leads us to five distinct methods:
- Kreg Rip Cut: Highly efficient for repetitive cuts of identical sizes. With the Rip-Cut, once you set your desired width (up to 24 inches), you can seamlessly execute multiple cuts without recurrent measurements. It accelerates the process when crafting several pieces of the same dimensions.
- Kreg Accu-Cut: A favorite among many due to its precision and efficiency.
- Kreg Straight Edge Guide: Perfect for those who frequently make long beveled cuts, which aren’t feasible with the prior two guides.
- Scrap Wood: Arguably the most adaptable approach, this method can cater to any board size and cut type. However, its effectiveness is contingent on the straightness of the chosen scrap wood. While it’s cost-effective, it demands clamps and offers a lengthier setup time, which might not be ideal for projects with numerous cuts.
- Speed Square: An ideal quick solution for minor woodwork tasks.
When reflecting on personal preferences, investing in the Kreg Accu-Cut and Rip-Cut guides emerges as a top recommendation. They synergize to offer a blend of precision and speed, significantly enhancing your woodwork sessions.
Conclusion
The journey to impeccable straight cuts is not just about mastering techniques but also ensuring woodworking safety tips are followed at all times. Each method comes with its unique set of advantages. While methods like using scrap wood offer versatility, investing in specialized guides like those from Kreg can significantly elevate the precision and speed of your woodworking tasks. For those in the area, Canberra Handyman Services also provides expert guidance and assistance in mastering these techniques. The key is to discern the technique that aligns best with your requirements and workflow. Remember, with the right tools, techniques, and safety practices, every cut can be a step closer to perfection.