
Last Updated on October 21, 2023 by Pro Handyman Australia – Editorial Team
There’s nothing quite as frustrating as watching water pool around your feet in the shower, or standing by helplessly as your kitchen sink overflows with murky water. Blocked drains are a common household woe, often arriving at the most inopportune moments. But before you reach for the phone to call in a professional or rush to the store for a chemical solution, know that there are several DIY techniques at your disposal. These home remedies can be surprisingly effective, eco-friendly, and wallet-friendly too. In this blog, we’ll walk you through a variety of DIY drain unclogging methods that will restore the free flow of water in no time. Whether you’re a DIY novice or a seasoned pro, there’s a solution here for you!
Understanding Household Clogs: Causes, Prevention, and Solutions
Household clogs are an unfortunate but common occurrence that every homeowner or renter will encounter at some point. Whether it’s a slow-draining sink, a bathtub that’s reluctant to empty, or a toilet that won’t flush, clogs are more than just an inconvenience; they can lead to water damage, unsanitary conditions, and expensive repair bills. But what exactly causes these clogs? Let’s delve deep into the labyrinth of pipes to understand the culprits and how to prevent them.
1. Anatomy of a Household Plumbing System
To understand clogs, it’s essential first to comprehend how household plumbing systems work. Houses are equipped with two primary plumbing systems:
- Supply system: Carries fresh water into the house.
- Drain-waste system: Transports wastewater out of the house.
It’s typically the drain-waste system that’s susceptible to clogs.
2. Common Causes of Clogs
a) Hair:
Hair is one of the most prevalent culprits when it comes to bathroom drain clogs, especially in showers and bathtubs. Over time, hair can bind with grease and other sticky substances, creating sizeable blockages.
b) Grease and Fats:
When washed down the sink, cooking grease, fats, and oils can solidify in the plumbing system, adhering to the pipe walls and narrowing the passage for water to flow.
c) Soap Residue:
Soap, especially traditional bar soaps, can leave residue that sticks to pipe walls. Combined with minerals in water and debris, soap can form soap scum, further contributing to blockages.
d) Food Particles:
While garbage disposals chop up food into smaller pieces, certain foods like rice, pasta, and coffee grounds can form stubborn clogs. They either expand in water or are granular and get trapped in bends and joints.
e) Foreign Objects:
Anything from children’s toys to cotton swabs and sanitary products can lead to severe blockages if they find their way down drains.
f) Tree Roots:
While not an indoor culprit, tree roots are notorious for invading outdoor sewer lines. They grow into the pipes, seeking water, and over time can cause significant blockages and even structural damage.
g) Hard Water Mineral Buildup:
In areas with hard water, minerals like calcium and magnesium can precipitate out of the water and accumulate in pipes, reducing flow and leading to clogs.
3. Prevention is Better than Cure: Tips to Avoid Clogs
a) Use Drain Screens:
These handy devices can capture hair and other debris, preventing them from going down the drain.
b) Properly Dispose of Grease:
Instead of pouring it down the sink, let grease and oils solidify in a container and then throw them away.
c) Be Cautious with Food Scraps:
Scrape plates into the trash before washing them, even with a garbage disposal in place.
d) Regularly Clean Drains:
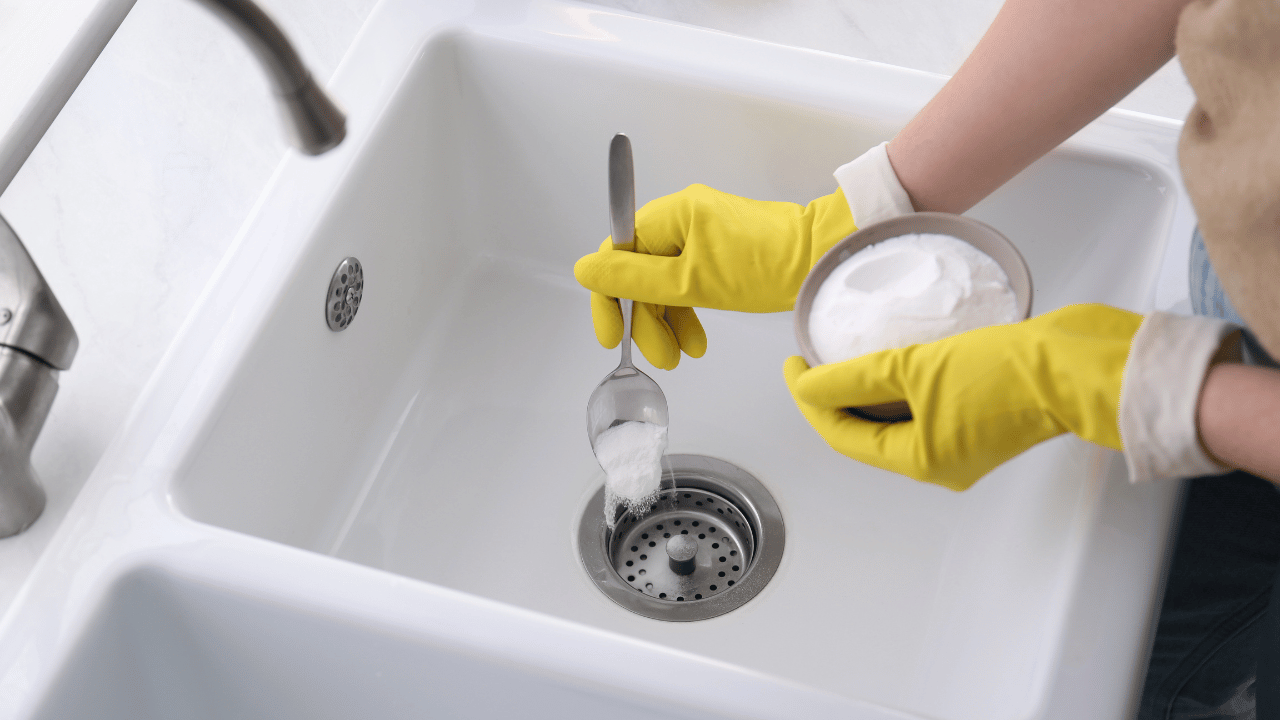
Use a mixture of hot water, baking soda, and vinegar to naturally break down minor blockages and keep pipes clean.
e) Educate the Household:
Ensure every member of the household knows what can and can’t go down the drain or be flushed down the toilet.
4. Dealing with Clogs: Safe and Effective Solutions
a) Natural Cleaners:
Before resorting to harsh chemicals, try natural alternatives. A combination of baking soda followed by vinegar can dissolve many blockages.
b) Plunging:
A good old-fashioned plunger can create suction that can help dislodge blockages.
c) Drain Snake or Auger:
This is a long, flexible tool that can be manually or mechanically rotated to dislodge clogs.
d) Check Cleanout Plugs:
Under sinks and basins, there are usually U-shaped pipe sections with cleanout plugs. Sometimes, removing these can provide direct access to a clog.
e) Professional Help:
If home remedies don’t work, it may be time to call in a professional plumber. They have specialized equipment, like hydro jets and camera inspection tools, to tackle stubborn clogs.
Understanding the causes of household clogs is the first step to both prevention and effective solutions. With a combination of careful practices and regular maintenance, many clogs can be avoided. However, for those stubborn blockages, know that effective solutions, both DIY and professional, are available.
Essential Tools for Drain Unclogging
- The Classic Sink or Toilet Plunger:
The plunger, with its flexible rubber bell or cone design and a handle for operation, stands as a time-honored tool for addressing clogs. By pushing water into the drain pipes, it aids in moving the obstruction further down the pipe. While plungers are highly effective for toilets, they offer moderate success for kitchen sinks, tubs, and showers. However, due to some sink designs, they might not always be the best fit for bathroom sinks. - Hair Clog Remover Tool:
Designed specifically for snaring hair obstructions, the hair clog remover tool is a slender plastic cord adorned with multiple spikes. Once inserted into a drain and then extracted, its spikes catch and pull out hair accumulations. Primarily useful for bathroom sinks, they also find limited application in bathtubs and showers. It’s worth noting that they aren’t suitable for toilets or kitchen sinks. - The Method of Removing and Cleaning the Sink Trap:
This approach requires a hands-on method. By detaching the plastic or metal P-trap drain located beneath the sink, you can manually extract the clog before re-fixing the cleared trap. Despite being a bit messy, this method serves as a highly effective solution for bathroom and kitchen sink drains. It’s essential to note that the clog should ideally be within the P-trap or the initial sections of the household’s drainpipe for this technique to work.
Pro Tip:
Considering using a drain snake for your bathroom or kitchen? Instead of snaking directly through the drain, you might find it more efficient to remove the trap for cleaning or to introduce the snake via the trap.
- The Drain Snake (Auger):
A drain snake or auger is a manual device housing a flexible metal cable within a drum. Users can turn the drum, allowing the cable to venture as far as 25 feet into the drain system. Its metal, corkscrew-like tip is designed to latch onto the clog, facilitating its extraction when the cable is retracted. Renowned for their efficiency, drain snakes are adept at tackling fibrous obstructions deep within the drain. They’re suitable for toilets, and all types of sinks, tubs, and showers.
Liquid Drain Cleaners:
These environmentally-friendly solutions utilize a combination of bacteria, enzymes, and live cultures to dissolve common culprits of drain blockages like hair, grease, and paper. While they act more gradually, liquid cleaners are moderately effective for tackling clogs that aren’t situated too deep within the drain.
Safety First!
It’s paramount to remember that interacting with drains, especially using invasive methods like trap removal or drain snaking, exposes one to bacteria. Always prioritize safety by wearing waterproof gloves, protective eyewear, and a mask. Additionally, even though hair clog remover tools are plastic, their spikes can be sharp. Always handle them by their designated handle end.
Unclogging a Toilet Using a Flange Plunger
Safety First: Before you begin, always ensure you are wearing waterproof gloves and safety glasses to shield against unexpected splashes.
Checking Water Levels: It’s crucial to ascertain that the water level in the toilet bowl adequately submerges the plunger cup. If the water is insufficient, add some more to reach the desired level.
Positioning the Plunger: Angle the plunger and gently submerge its cup into the water, making sure it fills up.
A Handy Tip: One might assume that pushing air into the drainpipe might be effective. However, pushing water proves to be a better option. Water, being incompressible compared to air, exerts greater force when the plunger is pressed down.
Applying Force: With a blend of vigor and precision, push the plunger down and then pull it upwards. Repeat this action multiple times. If you notice the seal between the plunger cup and the toilet bowl breaking, adjust its position and continue the process. A successful plunge will result in rapid drainage of the water in the bowl.
Finishing Touch: Once done, remove the tank lid and spot the round rubber trap door, commonly known as the flapper, at the base of the tank. This acts as an emergency shut-off if the toilet remains clogged. Give the toilet a flush. If it functions smoothly, cap it off by replacing the tank lid.
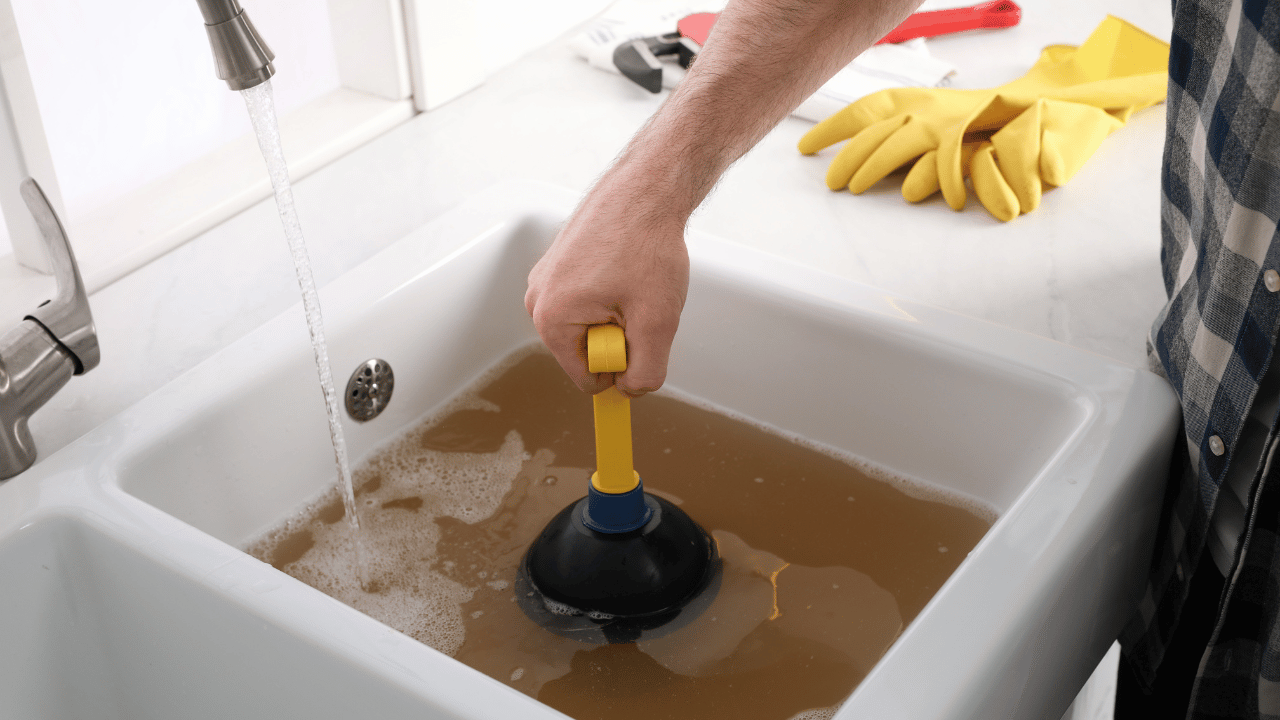
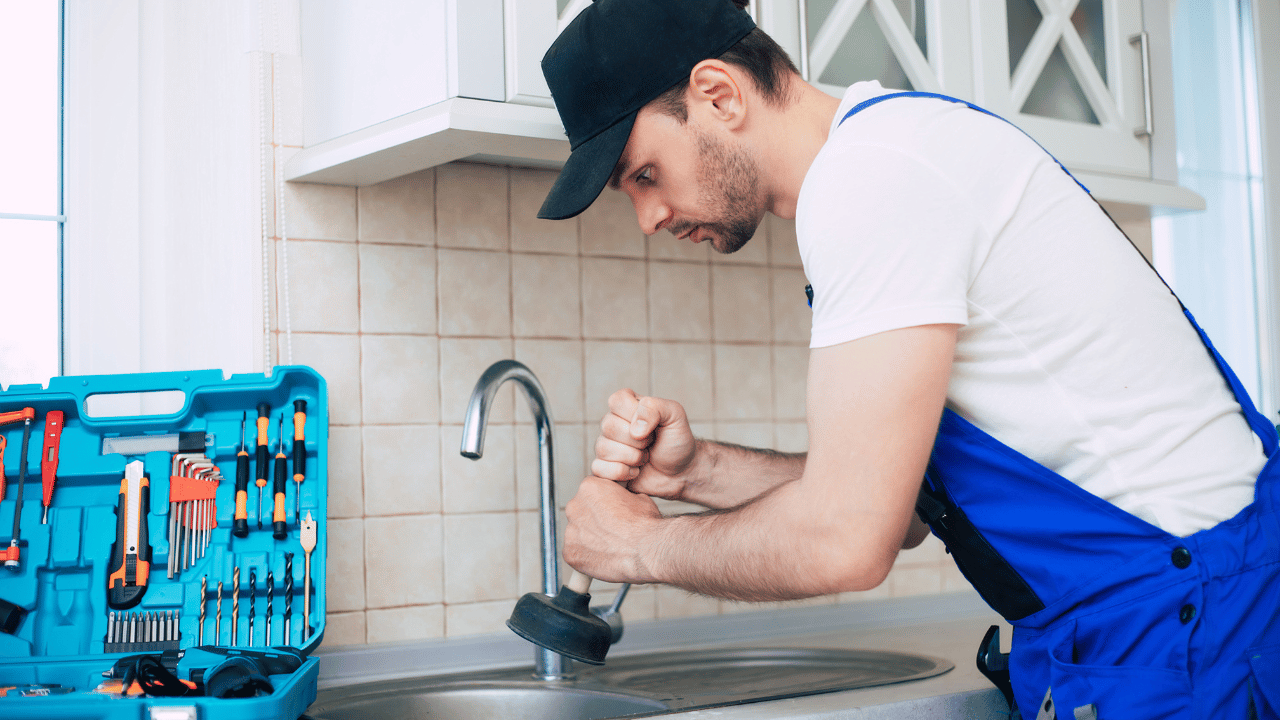
Unclogging Sinks, Tubs, or Shower Drains Using a Standard Plunger
Safety Precautions: As always, prioritize your safety by wearing waterproof gloves and safety glasses.
Preparing the Washcloth: Drench a washcloth thoroughly and set it aside momentarily.
Adjusting Drain Covers: For sinks and tubs, dislodge the pop-up drain stopper or the bathtub cover. When dealing with showers, ensure the drain grate is removed.
Ensuring Adequate Water Levels: Check that there’s enough water in the sink, tub, or shower pan to cover the plunger’s cup. If not, you can manually fill it using a cup or bucket.
Managing the Overflow Hole: For those sinks or tubs equipped with an overflow hole, fold your wet washcloth and use it to cover this hole. If possible, have someone assist by holding the washcloth in place, allowing you to focus on plunging.
Submerging the Plunger: With care, tilt the plunger and immerse its cup into the water, ensuring it fills up.
Pressing and Lifting Action: Apply force downwards on the plunger and subsequently pull it up. This action should be repeated multiple times for maximum effectiveness.
The Final Rinse: Once you are confident the clog has been addressed, let hot water run through the drain for several minutes to ensure a clear passage.
Efficiently Unclogging a Sink Drain with a Hair Remover Tool
Choosing the Right Tool: When shopping for a hair remover tool, you’ll find a variety of options. Some are straightforward devices that can be directly lowered into the drain to retrieve clogs, while others come equipped with a small crank. This crank is useful for rotating the spiked end within the drain, similar to a sink auger.
Steps for Using the Hair Remover Tool:
- Preparation: Begin by removing the pop-up drain stopper from the basin.
- Inserting the Tool: Gently introduce the spiked end of the tool into the drain. If you encounter any resistance, gently move the tool up and down several times.
- Retrieving the Clog: Slowly retract the tool. If done correctly, the clog should be attached to it. Using paper towels, detach the clog from the tool and dispose of it.
- Utilizing the Rotation Feature (if available): If your tool boasts a rotation feature, insert the spiked end into the drain. While holding the handle’s center, use the other hand to turn the crank. After several rotations, extract the tool, and the clog should come with it.
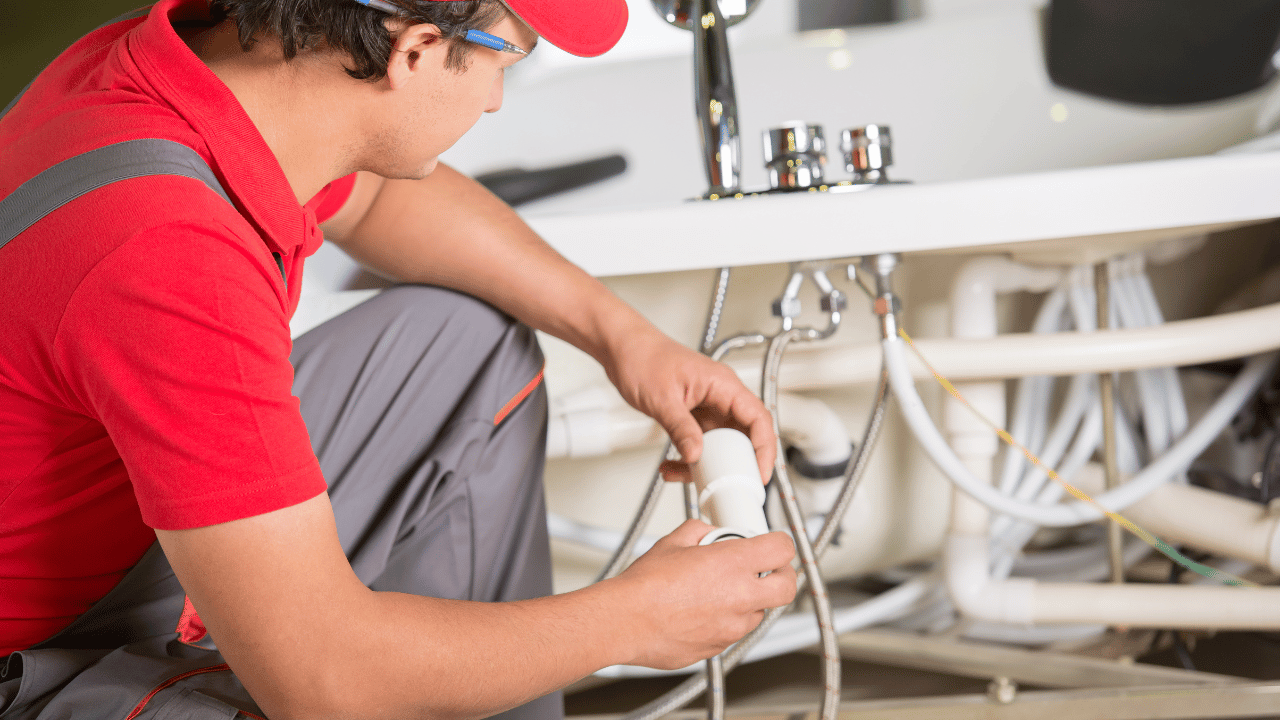
Efficiently Cleaning the Trap to Address Clogs
Essential Tools: Before embarking on this procedure, ensure you have old rags, a flashlight, and waterproof gloves on hand.
Steps to Clean the Trap:
- Preparation: Position a bucket right under the sink, aligning it with the P-trap. Keep the rags close by for easy access.
- Removing the Curved Bend: The P-trap’s curved bend can be detached by loosening the slip nuts found on both sides. For a stronger grip, use a rag. When you remove this section, be prepared for water to flow out. Place the detached bend into the bucket.
- Detaching the Trap Arm: Next, unfasten the straight trap arm by loosening the slip nut which connects the trap arm to the drainpipe within the wall. Place this arm in the bucket.
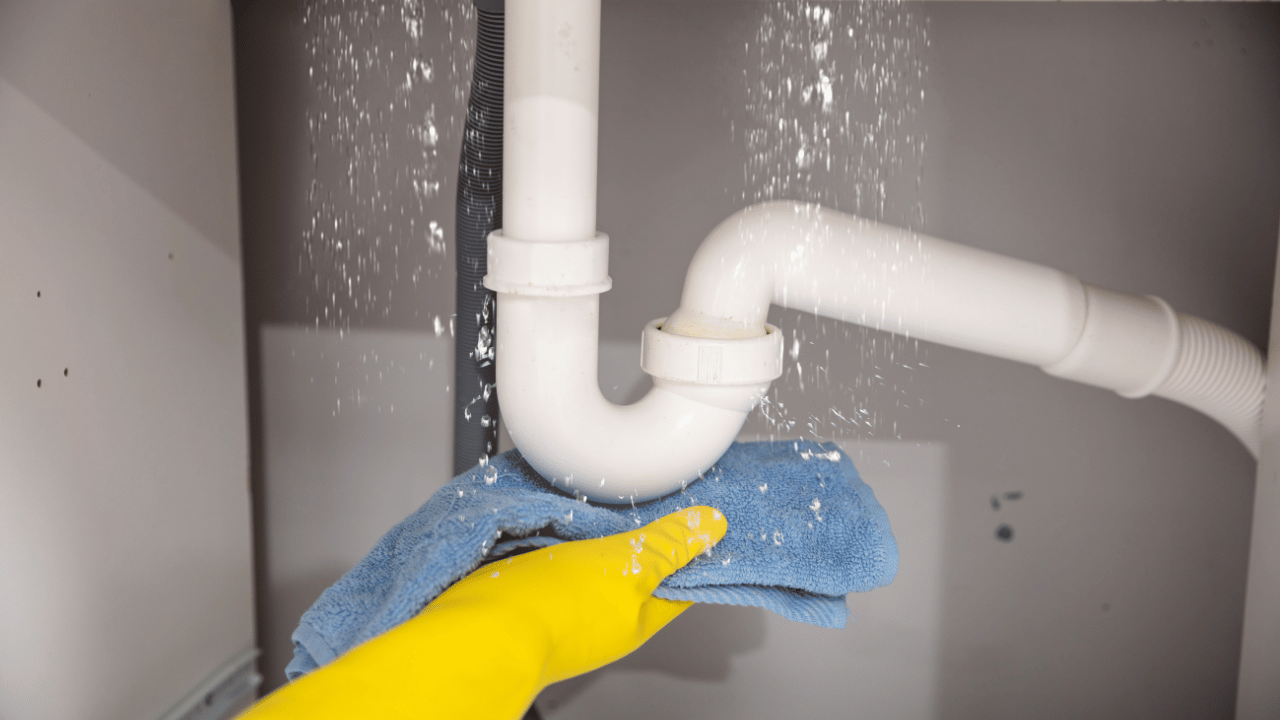
- Cleaning the Disassembled Parts: To clean the P-trap components, carry them outdoors. Empty the bucket’s water and thoroughly rinse the pieces with a hose. If you notice that the parts are overly soiled with grease and grime, it’s advisable to discard them and replace them with a fresh P-trap.
- Reassembly: Fit the new P-trap, following the reverse order of the removal process. Start by affixing the new trap arm to the wall, and then connect the bend between the trap arm and the sink. Ensure all slip nuts are securely tightened.
- Testing the P-Trap: Once everything is in place, run water through the system. Observe for any potential leaks below to ensure your reassembly was successful.
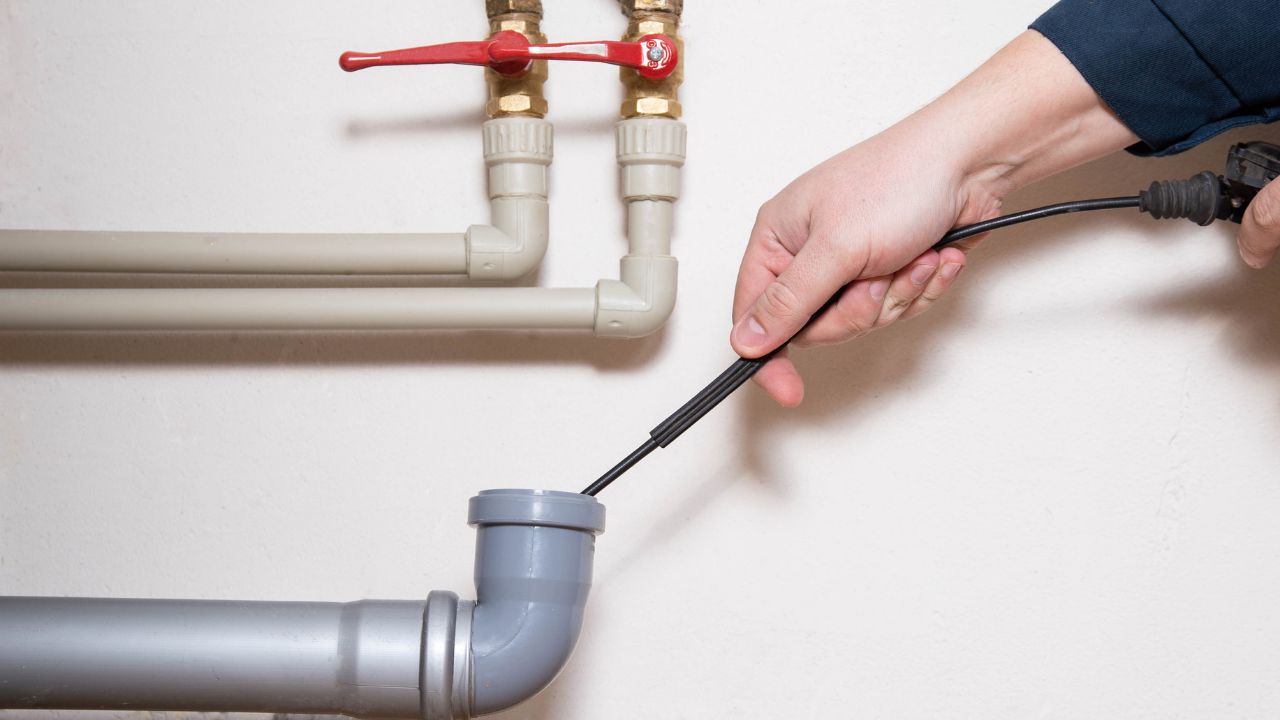
Effectively Snaking a Drain to Clear Blockages
Essential Tools: Before beginning the process, ensure you have a sink or toilet snake (also known as an auger), towels, and preferably, a shop vacuum.
Step-by-Step Guide:
- Preparation: Start by removing the sink pop-up drain stopper or the grate covering the shower or tub drain.
- Clearing the Water: It’s essential to get rid of as much water as possible from the basin, tub, or shower pan. Utilize a plunger, shop vacuum, or towels to soak up the water. If unable to drain all the water, it’s still possible to proceed with snaking through the standing water.
- Inserting the Snake: Delicately place the corkscrew end of the drain snake into the drain, pushing it as far as it can go independently. Once in place, secure it by tightening the thumbscrew on the drum.
- Operating the Snake: Start rotating the drain snake by turning its handle, allowing it to navigate through the obstruction.
- Retrieval: Gently pull back the cable into the drum, which should now have the clog attached at its end.
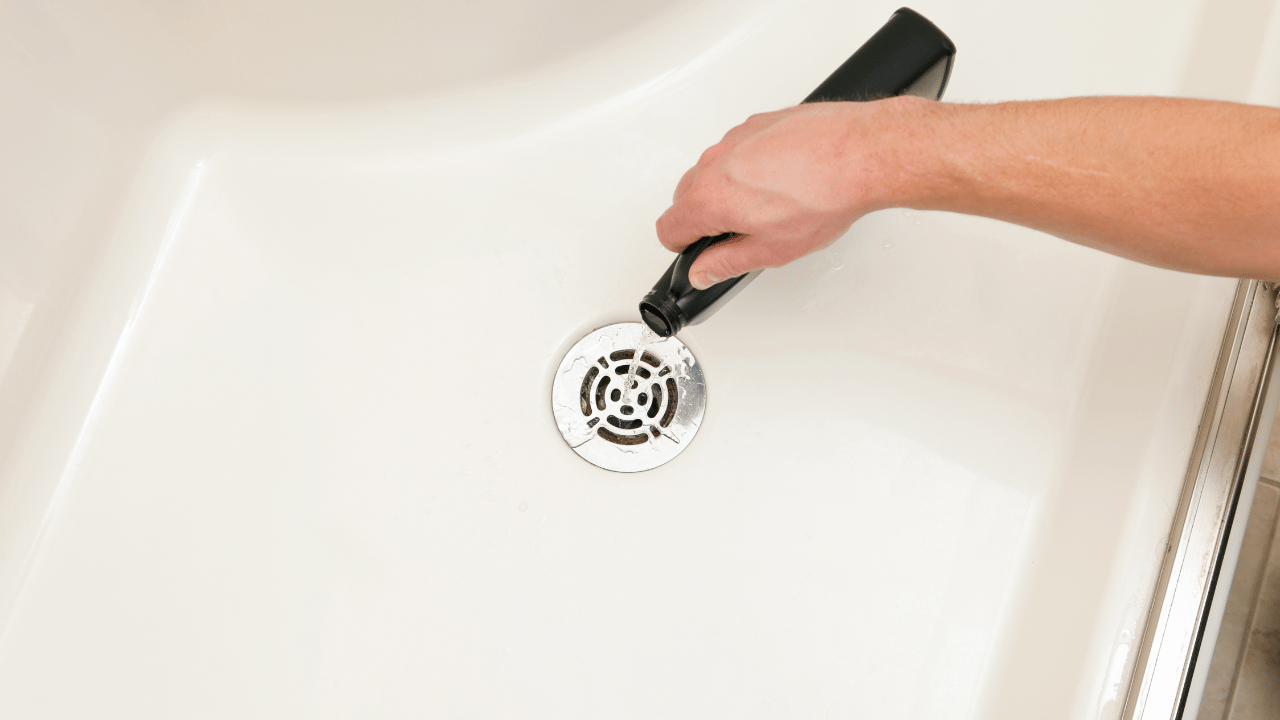
Addressing Drain Clogs with Liquid Drain Cleaners
Preparation Steps:
- Setting the Stage: Begin by removing the sink pop-up drain or the shower or tub drain grate.
- Water Clearance: Use a plunger or a shop vacuum to extract as much water as you can from the area.
Application:
- Administering the Cleaner: Gently pour the liquid drain cleaner into the obstructed drain. It’s crucial to refer to the product’s guidelines to determine the correct quantity. Typically, you should let the cleaner sit for at least an hour, but eco-friendly variants might necessitate a waiting period of up to 24 hours.Helpful Hint: Typically, toilets demand double the cleaner amount compared to sinks, tubs, or showers.
- Final Flushing: After the waiting period, rinse the treated drain with hot water to ensure smooth flow.
Determining the Need for Professional Assistance
There are moments when expert intervention becomes indispensable. If there’s an imminent risk of the blockage causing an overflow in your home, it’s advised to contact an emergency plumber without delay. Extracting certain challenging objects, like jewelry, from drainpipes can be tricky for the average person but might be manageable for a professional. Note that most consumer-level drain snakes have a reach of up to 25 feet. If a blockage exists beyond this range, it would be best to consult a plumber to resolve the issue.
Conclusion
DIY drain unclogging techniques offer homeowners both a cost-effective and immediate solution to common plumbing annoyances. As we’ve delved into these methods, from the classic plunger to more specialized tools like the auger and liquid cleaners, it’s evident that with a bit of patience and the right approach, most blockages can be addressed without the need for professional intervention. However, while these techniques are invaluable, it’s equally essential to recognize when a problem is beyond DIY capabilities. Regular maintenance and being proactive can prevent many clogs, but when faced with persistent or severe blockages, it’s always prudent to consult with a plumbing expert. In the end, these DIY techniques aren’t just about fixing a problem; they’re about empowering homeowners with the knowledge and confidence to take care of their living spaces.