Last Updated on October 18, 2023 by Pro Handyman Australia – Editorial Team
Cutting large tiles requires precision, and while a wet saw is often the most suitable tool for this task, many wonder How to Cut Ceramic Tile Without a Wet Saw. Here’s a simple guide to ensure you achieve perfect cuts with your tiles, whether you’re using traditional methods or seeking alternative approaches.
Essential Tools for Wet Saw Tile-Cutting
For a successful tile cutting project, it’s vital to have the right tools at your disposal. Here’s a checklist of what you’ll need:
- Measuring and Marking: This includes a measuring tape for accurate dimensions and a wax pencil for marking precise cutting lines.
- Cutting and Smoothening: Apart from the wet saw, have a tile nipper with a scoring tool for minute adjustments and a double-sided grinding stone to refine tile edges. Also, 2-by-4 boards are essential for supporting tiles during the cutting process.
- Drilling and Additional Tools: A variable-speed drill equipped with a carbide-tipped tile drilling bit and a carbide-tipped tile hole saw will be handy. Don’t forget masking tape for better grip and precision when drilling.
With these tools and the knowledge of how to use them, even DIY enthusiasts can master the art of cutting large tiles to perfection. Remember, precision is the key, and practice makes perfect.
The Power-Packed Method: Using a Wet Saw
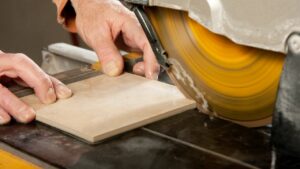
If you’re more inclined towards using power tools, weighing the jigsaw vs circular saw options might lead you to consider another alternative: a wet saw. Begin by positioning the tile under the saw blade, aligning your marked line with it. After filling the water channel, activate the saw. Carefully lower the cutting blade onto the tile, gradually guiding it to cut along the marked line. In this process, it’s essential to be patient and move slowly, ensuring a clean cut. Once done, carefully lift the blade and allow it to stop before removing the tile.
Diving Deep into Wet Saws
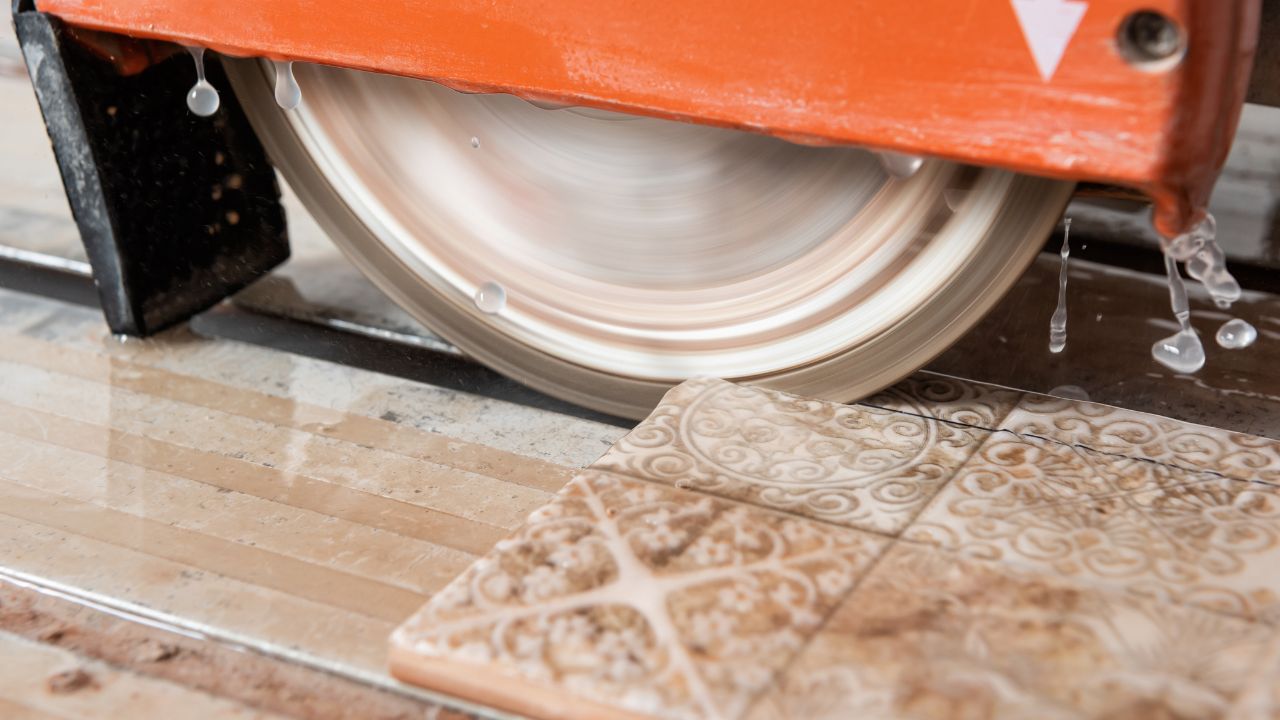
For those keen on mastering tile cutting, understanding the wet saw is paramount. This power tool, reminiscent of a table saw, boasts a rotating blade adept at slicing through tiles. Its unique feature is the water it employs to cool and lubricate the blade and tile, ensuring impeccably straight cuts while drastically reducing dust.
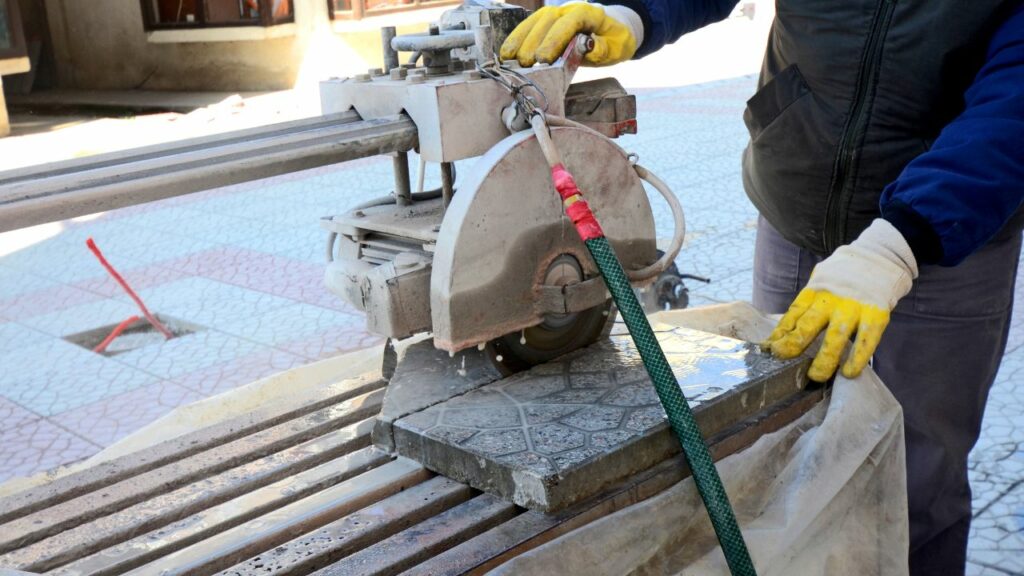
Most compact DIY models come with a stationary table where the tile is slid across. More advanced versions, on the other hand, are equipped with a sliding tray that guides the tile past the blade. Features such as an adjustable cutting guide, an angle-guide attachment, and a tiltable blade or tray further augment the wet saw’s utility, solidifying its position as a top-tier tile-cutting tool.
Mastering Basic Cuts with a Wet Saw
1. Setting up Your Workspace:
Begin by positioning the saw on a stable and level foundation, such as a tile saw stand. This ensures an ergonomic height, eliminating any need to hunch or overreach. Opt for a spacious, well-lit area for optimum visibility of the table or tray, tile, and blade. When working in spaces susceptible to mess, spread out drop cloths to shield the surroundings.
2. Preparing the Water Reservoir:
Pour clean water into the saw reservoir, ensuring it’s not overfilled. Periodically replace the water as you progress with your cuts. Clean water not only ensures a finer cut but also prolongs the lifespan of saws that utilize a pump to circulate water. Remember, accumulated debris can compromise cut quality.
3. Blade Adjustment:
Some saw models permit blade height adjustments relative to the table or tray. However, smaller variants come with a fixed blade and table setup. If your saw features a movable tray, ensure its slot aligns perfectly around the blade while sliding it past.
4. Precise Measurement and Marking:
To guarantee accurate cuts, employ a square or straightedge to delineate cut lines. A china marker proves handy for marking the tile’s surface, as it remains intact despite water exposure and can be easily wiped post cutting. For efficiency, mark all tiles beforehand to prevent constant interruptions.
5. Execution of the Cut:
Lay the tile on the table or sliding tray, ensuring the larger section remains sandwiched between your hand and the blade. Firmly press the tile against the guide fence. For diagonal cuts, secure the tile within the angle guide and adjust so that the cut line corresponds with the blade. If you’re accustomed to understanding how to cut straight with a circular saw, applying similar principles of alignment and positioning will serve beneficially here.
6. Guiding the Tile’s End:
As you approach the tail end of your cut, employ a push stick or guide to safely navigate the remaining tile portion past the blade.
Video on How to Cut Tiles with a Wet Saw
Step into the world of tile cutting with our comprehensive video tutorial on using a wet saw. From safety precautions to expert techniques, this guide is tailored for both beginners and seasoned DIYers. Understand the mechanics behind the wet saw, its benefits, and the pivotal role water plays in ensuring precise cuts. With close-up demonstrations and clear instructions, you’ll soon be cutting tiles like a pro. Whether it’s ceramic, porcelain, or natural stone, we’ve got you covered. Tune in and elevate your home renovation skills!
The Role of Water in Wet Saws
Operating a wet saw without water isn’t recommended, just as knowing how to clean a table saw blade is essential for its maintenance. The water is crucial in a wet saw to prevent blade overheating, which not only damages the blade but can also present safety risks. This principle of care and maintenance is pivotal across all saw types, as proper use and cleanliness ensure longevity and performance. Besides, water plays a vital role in dust management, reducing airborne particles and providing a safer work environment.
Achieving a Chip-Free Cut
For those seeking a flawless, chip-free cut, the secret lies in cutting slowly and ensuring the blade is razor-sharp. As you hone your tile-cutting prowess, gauging the right cutting speed becomes second nature, and you’ll also develop a knack for identifying when the saw blade needs replacement.

Proper Tile Positioning for Optimal Cuts
The orientation of your ceramic tile—whether face up or face down—largely hinges on the type of saw you’re using. When working with wet saws, it’s essential to note the direction from which the blade cuts. The surface first coming in contact with the blade will yield the smoothest cut. Therefore, if the blade cuts from the top, place the tile face up. Conversely, if the blade cuts from the bottom, orient the tile face down.
Precise Measurement is the Key
Before beginning the cutting process, it’s essential to measure the precise location where you intend to place the tile. Using a measuring tape, determine the exact dimensions, remembering to account for the width of the spacers. This will give you a clear indication of the tile size you require. Once you have these measurements, mark the intended cut on the tile using a wax pencil.
User Experience: Journey with the WTS-3000 Wet Saw
It’s always enlightening to dive deep into hands-on experiences, so let’s explore the user journey with the Bosch 18 V Cordless Circular Saw – a top-tier model renowned among DIY enthusiasts and professionals alike.

Jane, a seasoned DIY enthusiast from Melbourne, shared, “I’ve tried several wet saws over the years, but nothing cuts large tiles as smoothly as the Bosch 18 V Cordless Circular Saw. Its precision is unmatched. I recently took on a project of renovating my patio, and the large granite tiles were a breeze to cut with this model.”
In contrast, Mike, a professional tiler from Geelong, mentioned, “For commercial projects where time is money, the Bosch 18 V Cordless Circular Saw shines with its quick setup and consistent performance. I remember a project where we had to lay large ceramic tiles for a hotel lobby. This saw’s efficiency not only impressed my team but also enabled us to finish ahead of schedule.”
From these firsthand accounts, it’s evident that the Bosch 18 V Cordless Circular Saw, among other popular brands, has carved a niche for itself in the world of wet saws.
In-depth Comparisons: Wet Saw Showdown
In the universe of wet saws, several models stand out, but how do they fare against each other? Let’s delve into an insightful comparison to help you make the best choice for your needs.
| Model | Power (HP) | Blade Diameter (in) | Max. Cut Depth (in) | Price ($) |
|---|---|---|---|---|
| Bosch 18 V Cordless Circular Saw | 1.5 | 10 | 3.75 | 899 |
| SKIL 15 Amp Circular Saw | 1.2 | 8 | 3.5 | 799 |
| Evolution Power Tools S185CCSL | 1.4 | 9 | 3.6 | 850 |
While the Bosch 18 V Cordless Circular Saw stands out in terms of power and cutting depth, the SKIL 15 Amp Circular Saw offers a more budget-friendly option without compromising too much on performance. Meanwhile, the Evolution Power Tools S185CCSL bridges the gap, offering a balance of power and value.
Specialized Tile Cutting Methods
The Traditional Approach: Using a Tile Cutter
The tile cutter offers a more manual approach. Start by placing the tile into the cutter, ensuring that your marked line aligns with the cutter’s central cutting line. Ensure the excess part of the tile is well-supported and level within the cutter. By holding the tile securely, run the cutting blade across the tile. Once done, simply slide the tile out and gently bend it to break along the drawn line.
Crafting Curves: Making Relief Cuts

For those ambitious projects that require curved cuts, understanding how to use a circular saw can be a game-changer. Relief cuts are invaluable in this process. Initiate these cuts from one edge of the tile, moving towards your marked line. It’s crucial to stop around a quarter inch before the line. These relief cuts not only reduce stress on the blade but also facilitate a smoother curved cut. For optimal results, aim for one cut for every inch of the tile. When cutting along your curved line, slightly adjust the tile’s position, allowing the excess segments to fall off as you progress.
Perfecting Shallow Cuts

For more superficial cuts on tiles, one can score along the predetermined line and gently bend the tile to break it into two. If you’re looking to remove minor portions or adjust the tile’s dimensions slightly, this method proves effective. Tile nippers can be used for precision, especially when working around the room’s boundaries or managing smaller tile corners. Following this, it’s advisable to smoothen any rough tile edges using a double-sided sanding stone.
Leveraging a 2-by-4 Board for Support

An excellent technique for supporting a tile while cutting involves the use of scrap 2-by-4 boards. For a meticulous cut, consider drilling a hole in a separate 2-by-4 board, ensuring it’s of the same dimension or slightly larger than the desired tile cut. This board should then be placed beneath the tile, aligning the drilled hole with the tile’s cutting area. This approach not only sustains the tile’s weight but also eases the cutting tool’s operation.
Drilling Done Right
Drilling tiles requires careful preparation to achieve a clean cut. Start by placing masking tape over the tile area you intend to cut. This reduces the chances of slippage, ensuring a smoother operation. Opt for a drill set at a low speed and exert gentle pressure, continuing until the bit completely penetrates the tile.
Crafting Corner Notches with Precision
1. Accurate Measurement and Marking:
Determine and mark the tile’s edge on both sides of the intended notch. Using a straightedge, extend these markings until they intersect.
2. Precision in Cutting:
Adhering to the basic cutting steps mentioned earlier, slice along each line until the two cuts converge. If required, pause just shy of the intersection and utilize a coping saw or jigsaw to finalize the cut. For any rough edges in the notch’s inner corner, smoothen with aluminum oxide sandpaper or a tile file.
Crafting Bevel Cuts Using a Wet Saw
1. Measuring and Marking:
Start by taking precise measurements of the tile intended for beveling. After measuring, clearly mark the areas on the tile to guide your cut.
2. Blade Positioning:
Before powering on the saw, make adjustments to either the table or the blade itself, ensuring it’s set at your desired angle for the bevel cut.
3. Verifying the Cut:
Place the tile against the non-moving blade. This step is crucial to ensure the blade will trim only the necessary portion of the tile and achieve the perfect bevel.
4. Executing the Cut:
Referencing the previously discussed steps, align the tile with the marked area and proceed to cut along the indicated line to achieve a clean bevel cut.
Conclusion
Cutting tiles can seem daunting, but with the right techniques and tools, achieving precision and a polished finish becomes attainable. Whether you’re making shallow adjustments, drilling holes, or supporting tiles for more significant cuts, each method has its unique advantages. With patience and practice, even the most intricate designs can be executed flawlessly.