
Last Updated on October 21, 2023 by Pro Handyman Australia – Editorial Team
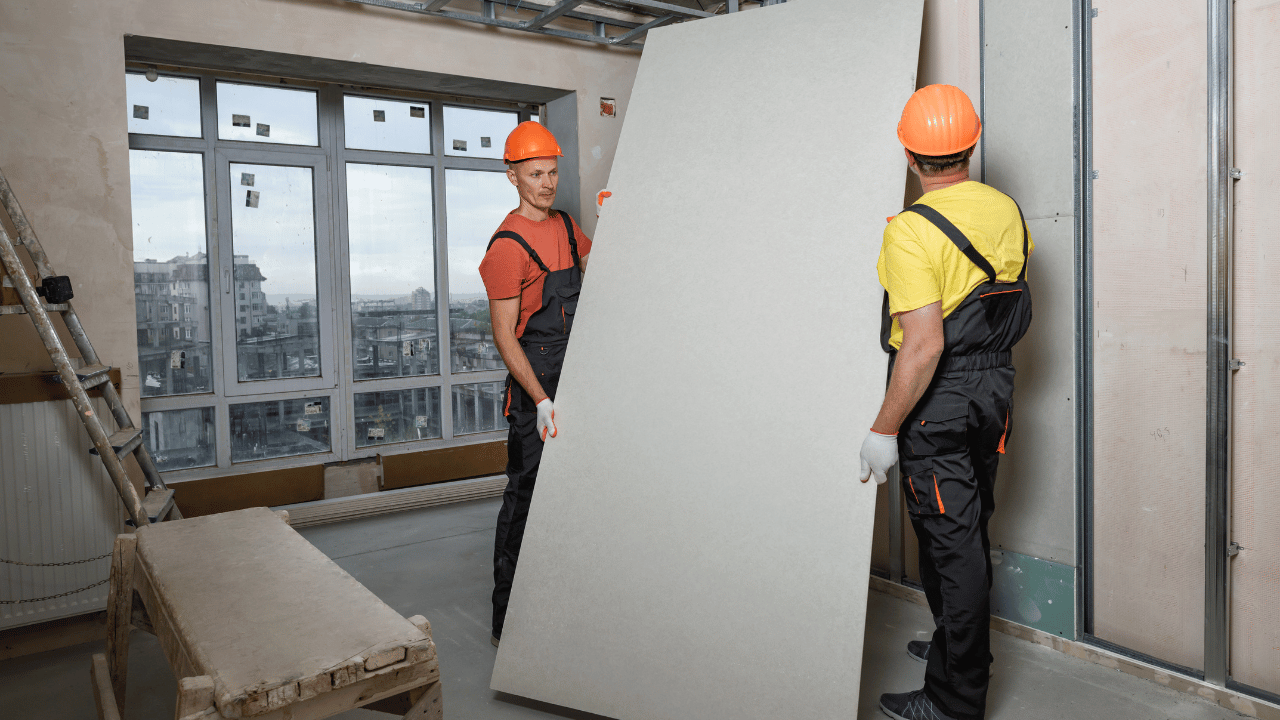
When it comes to home renovations or building projects, hanging drywall is a fundamental skill that transforms a skeletal framework into a space that feels like a room. Drywall, often referred to as sheetrock or plasterboard, acts as the canvas upon which a room’s character is built. Whether you’re diving into a DIY project, preparing for a bigger renovation task, or simply curious about construction basics, understanding how to hang drywall on walls is invaluable. In this guide, we’ll walk you through the step-by-step process, ensuring that you not only master the technique but also achieve a polished and professional-looking finish. Let’s transform those bare studs into smooth walls!
Choosing the Right Tools and Materials
The success of any drywall installation project begins with having the right tools and materials on hand. To ensure your drywall hangs perfectly and stays put, you’ll need the following:
- A 4-in-1 screwdriver, chalk line, cordless drill, drywall saw, hammer, level, pry bar, safety glasses, screw gun, stepladder, T-square, tape measure, taping knife, and utility knife.
- For materials, be sure to stock up on 1-1/4-inch and 1-5/8-inch drywall screws, drywall sheets, drywall nails, and consider having a 2×2 piece for optional support.
Understanding Drywall’s Value and Versatility
Among the myriad of construction materials available, drywall stands out due to its ease of use and affordability. A minor mishap isn’t a costly setback; it often amounts to a loss of minimal time and a few dollars at most. By taking on the installation yourself, the savings can contribute significantly to other aspects of your renovation, like room furnishings.
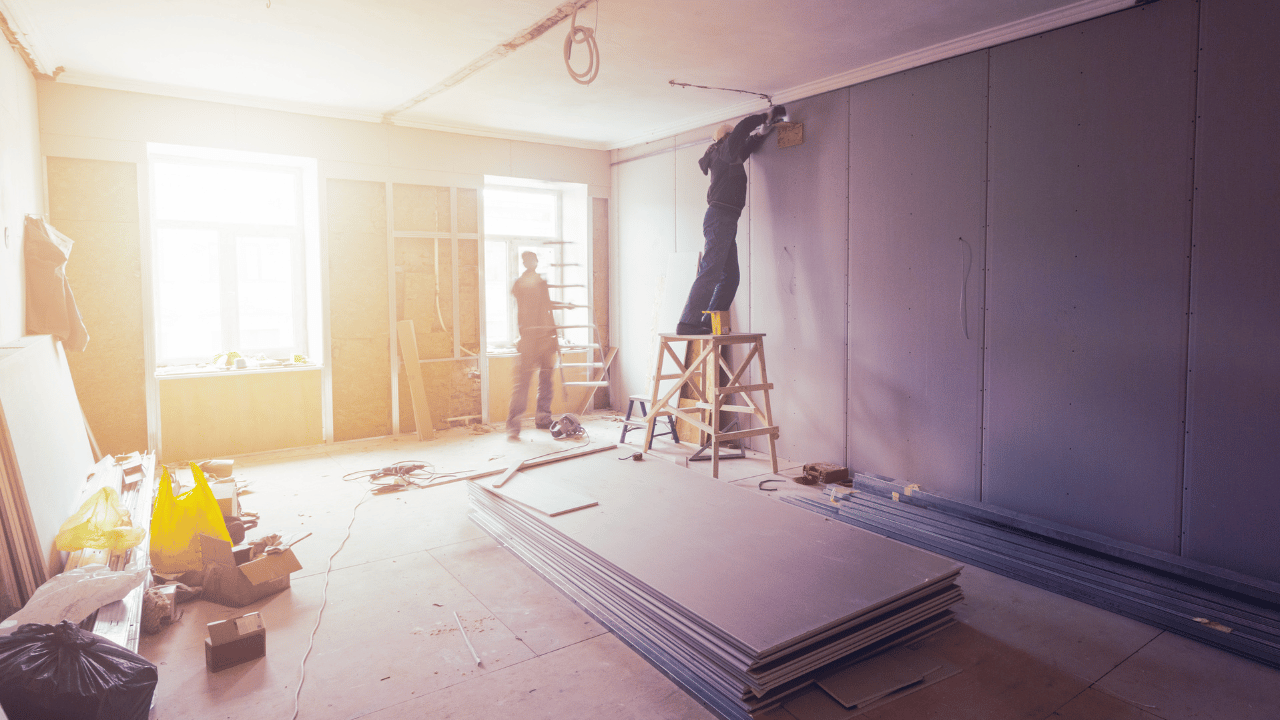
The Process of Hanging Drywall
Drywall, colloquially known as “rock” because of its derivative “sheetrock,” isn’t necessarily about finesse but is undeniably labor-intensive. If you’re in good shape and have the motivation, there’s no reason not to attempt installing drywall in multiple rooms. Professionals might sometimes be hesitant or booked up when it comes to smaller projects, and there’s a unique satisfaction derived from crafting and finalizing walls with your own hands.
Achieving the Best Results
Installing drywall correctly is the foundation for the subsequent finishing steps. A well-hung drywall simplifies the “taping” phase, which encompasses filling fastener holes, applying joint tape, adding three layers of taping compound to seams and corners, and then sanding for a smooth finish. Missteps during installation can make it challenging even for experienced professionals to produce a smooth, uncracked surface without any visible nail impressions and ready to be painted. In this guide, you’ll learn the methods and techniques professionals utilize to ensure their drywall work is efficient and sets the stage for effortless taping.
Mastering the Drywall Installation Process
1. Ensure Proper Support at Crucial Points Always affix wood backing in areas where the drywall ends lack support, particularly if the gap is more than 4 inches. Especially pay attention to corners and the junctions where the ceiling meets the wall.
2. Precision is Key When Measuring Start by measuring from the ceiling’s end to a joist’s midpoint, then cut the drywall sheet to the desired length. It’s essential to ensure that any end cuts divide the framing members evenly. Aim for gaps at the ends and splices to be less than 1/4 inch. To aid in fastening, draw guidelines every 16 inches from the sheet’s end using a drywall square. For ease of fitting, cut the total lengths approximately 1/4 inch shorter.
3. Scoring the Drywall for Perfect Cuts Determine the required length and carefully score the paper face of the drywall with a utility knife. Using a drywall square can help maintain a straight line.
4. Achieving a Clean Break Once scored, snap the sheet decisively. This should create a fold, after which you can cut through the paper on the opposite side.
5. Finishing with Smooth Edges For joints to fit tightly and seamlessly, smooth any rough edges of your cut ends using a Surform tool.
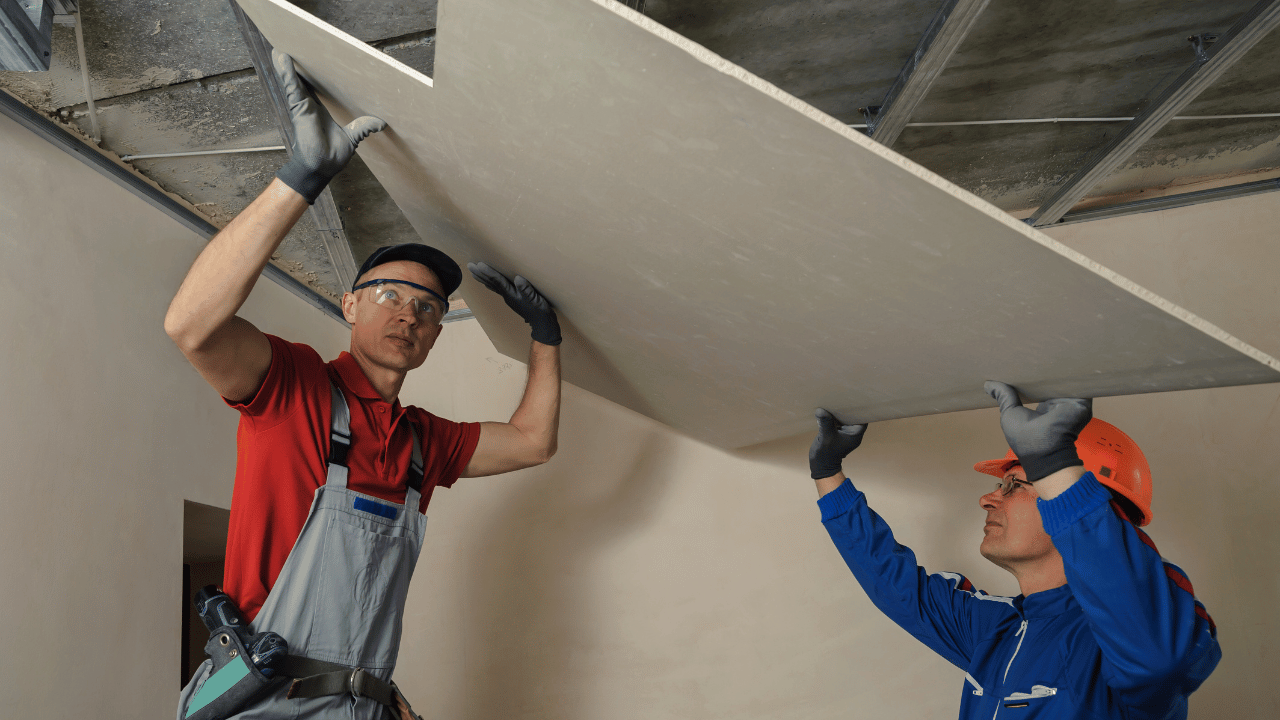
The Magic of Using a Drywall Lift Handling drywall can be back-breaking work, given its weight. To alleviate this, consider renting a drywall lift for the day. Especially beneficial when you’re working alone or handling 12-foot sheets, a lift can be easily disassembled, is relatively lightweight at about 75 lbs., and is transportable in a minivan or small truck. The lift is versatile, letting you hang sheets alone, although an extra pair of hands is still useful. Its design allows for easy loading, positioning, and placement. While the lift is handy for walls, it truly excels with ceiling installations.
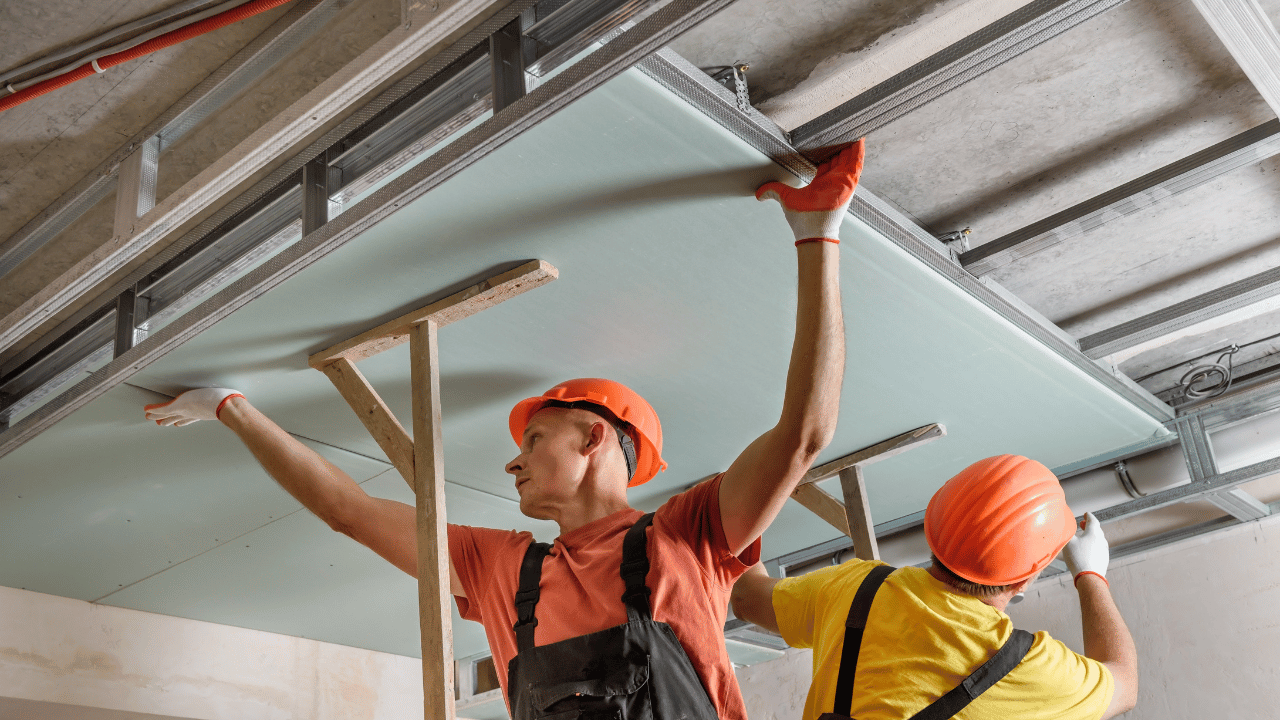
6. Properly Positioning the Sheet When installing ceiling sheets, lift them overhead, then temporarily secure them in place. To help manage the weight, use a “crutch” crafted from 2x2s. Once in position, pre-nail the sheet, ensuring it is firmly attached to the joists.
7. Detailed Measurements for the Upper Sheet Start from a wall corner and measure up to the center of a framing member. Ensure you also take note of distances for cutouts and any door or window openings. As a best practice, avoid placing joints over doors and window corners as this can lead to cracking.
8. Crafting the Perfect Openings When it comes to window and door notches, it’s possible to fashion these from a single sheet by employing a drywall saw for the sides. Though a keyhole saw may take a bit more time, it serves as a viable alternative, especially for extended cuts.
9. Mastering the Notch Cut To finalize the notch, begin by scoring the third side using a utility knife. Once that’s done, snap the section away and conclude the cut from its rear. Tip: When executing swift rip cuts, let your utility knife trail behind the T-square, ensuring the blade remains in contact with the square’s ruler section, while sliding it across the top.
10. Attaching the Upper Drywall Sheet Hoist the top sheet for the wall. Ensure it is firmly pressed against the ceiling before tacking it in place with nails. Tip: Always ensure the sheet is tight against the ceiling before securing it. It’s also critical to avoid breaking joints near windows or doors since this can result in eventual cracking and can complicate casing installation due to taping material buildup. Before hoisting, mark the spots for the fasteners.
11. Precision in Measuring Cutouts Make sure you measure electrical box cutouts from all its four sides. Always measure twice to prevent any mistakes during cutting.
12. Marking and Making the Cut Once your measurements are taken, transfer them onto the drywall. Utilize a keyhole saw to create openings for outlet boxes. Tip: Precision is essential when sawing cutouts for electrical boxes. An erroneous or overcut hole is not only challenging to correct, but the eventual repair might also look out of place.
The Versatility of the Spiral Cutout Saw Though it hasn’t been showcased here, many professionals now employ spiral saws for crafting openings for outlets, lights, doors, and even windows. This tool is incredibly intuitive: mark the center, hang the drywall, then use the thin spiral bit to follow the fixture’s edge. For doors and windows, hang the sheet across the opening and use the spiral bit to trace the framing. Despite the learning curve, potential dust, and initial investment, for extensive projects, this tool can be invaluable.
13. Positioning the Bottom Drywall Sheet Leverage the bottom sheet into position using either a foot lift or a flat bar. If any opening necessitates minor tweaks, refine the edges with your utility knife.
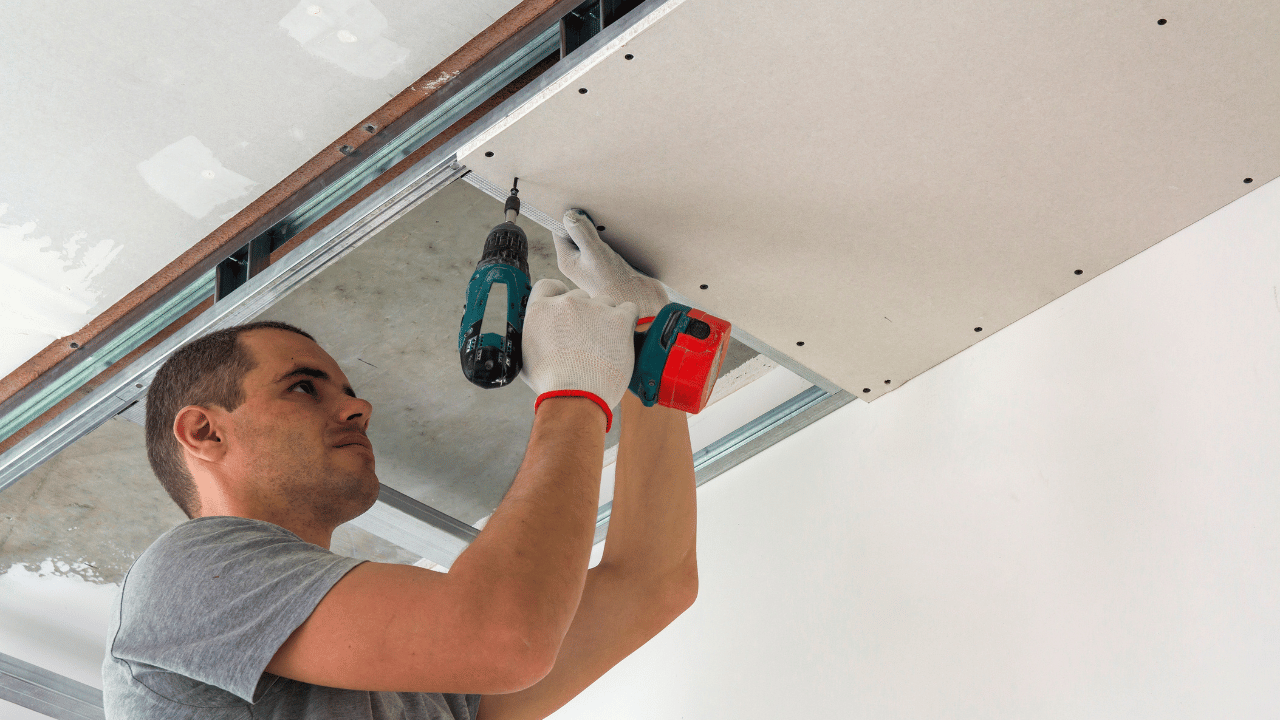
14. Securing the Drywall with Screws Proceed to fasten the drywall to the ceiling and walls with a screw gun. Tip: It’s best to use five fasteners for every framing member, including one at each tapered edge and three more placed every 12 inches. Angle the screws on sheet ends, ensuring they’re secure without breaking the drywall core. It’s recommended to use 1-1/4 inch fasteners for 1/2-inch drywall and 1-5/8 inch fasteners for 5/8-inch drywall, ensuring minimal use of nails and only as temporary support until screws are in place.
15. Ensuring a Smooth Finish Once the drywall is fully installed, scan the surface with a putty knife to locate any protruding fasteners. Note: If the putty knife produces a click sound, you’ve identified a fastener that needs adjusting. Never use a hammer for this, as it might damage the screw and complicate future fixes. Instead, utilize a screwdriver or cordless drill. Any misaligned fasteners should be removed.
Understanding Drywall Types and Selection
1. Types and Thicknesses When undertaking a drywall project, you’ll primarily encounter three fundamental types and thicknesses:
- Half-inch drywall is best suited for framing spans that are 16 inches or less.
- The five-eighths-inch variation, often referred to as Type X or fire-resistant drywall, is appropriate for spans extending up to 24 inches on ceilings. This type of drywall is particularly valuable in areas requiring firewalls, such as the partition between a home and its adjoining garage. For installation details, it’s advisable to consult your local building authority.
- For humidity-prone areas like bathrooms (where the environment is humid but not soaking wet), half-inch water-resistant drywall is recommended. However, this material isn’t suitable for ceilings or specific zones like tiled shower enclosures. In spaces where mold could be an issue, such as basements, mold-resistant drywall is available.
It’s essential to note that setups for door and window jambs, as well as electrical outlets, are typically designed for 1/2-inch drywall. Hence, it’s always good to verify this. While three-eighths-inch and 1/4-inch drywall are available, they’re infrequently used, barring instances with curved wall surfaces or when a thinner sheet is needed. For instance, when restoring old plaster walls, the 3/8-inch variety might be the only thickness that aligns with the plaster’s depth.

2. Dimensions and Handling Drywall is generally available in 4×8 or 4×12 dimensions. If you reside in a region with commercial suppliers, you’ll have access to a broader range compared to typical lumberyards. Such suppliers might offer 9-, 10-, and 14-foot lengths, 54-inch widths ideal for 9-foot ceilings, and even unique items like flexible drywall for curved structures. The length of the drywall doesn’t significantly influence the overall material cost. However, if you believe you can manage 12-foot sheets (and if they can maneuver through places like stairwells), they are a more efficient choice. Opting for these means reduced waste and fewer seams to address. It’s crucial to remember that while a 4×8 sheet weighs around 55 lbs., a 12-foot sheet can weigh approximately 82 lbs.
Preparing and Measuring Drywall for the Ceiling

Begin by assessing where the first panel will be placed. Start measuring from a corner, in a direction perpendicular to the strapping or joists. Ensure that if a panel doesn’t span the entire ceiling, its end lands on the center of a joist or strapping piece. To find the right measurement, measure up to the center of the furthest support piece the panel will overlap. Once measured, transfer this measurement to the panel’s edge and mark. Using a T-square aligned with the mark, score the panel’s front paper with a utility knife. Snap the excess part away from the score line and then cut through the paper backing to discard it. To help with the screw placements around the room, mark the top plate where strapping or joists meet the wall.
Installing Drywall on the Ceiling With the help of another person, lift the first panel to one corner of the ceiling, ensuring the edges are perpendicular to the strapping or joists and one end is adjacent to the wall. As the second person holds the panel in place, fix it using five screws spaced evenly across its width into the nearest joist or strapping. Use previously made marks on the top plate to align the screws, making sure to keep them at least half an inch from all edges. Maintain the screwheads just below the paper surface without breaking through. Repeat this process for each joist or strapping piece. Continue this pattern until the opposite wall is reached. Ensure that the end joints of the panels in subsequent rows are offset from the previous row by at least four feet. If a screw breaks the paper, insert an additional screw beside it.
Working Around Electrical Boxes Before covering an electrical box with a drywall sheet, measure from its center to the end of the last panel installed. Transfer this measurement onto the panel’s end. When you cover the electrical box with a new panel and secure it, stay at least 24 inches away from the box with screws. From your previous measurement, mark the new panel and use a rotary cut-out tool to create a hole around the electrical box, moving counterclockwise. Once the cutout is complete, secure the panel with the remaining screws.
Attaching Drywall to the Walls Identify all the stud locations on the ceiling panels adjacent to where you will hang the wall panels. Make sure the first panel’s end will be centered on a stud. If not, adjust its size as described earlier. With assistance, align the panel against the studs, ensuring one edge is against the ceiling and the end is tight to the adjacent wall. Using the ceiling’s stud marks as a guide, secure the panel with screws. Hang the panels across the top of the wall, extending them over any door or window openings. These excess parts can be trimmed later. Ensure that panel seams don’t align with door or window corners and avoid securing panels to door or window framing at this stage.
Final Touches Around Windows and Doors For the next row, install panels tight against each other. For the bottom row, use a tool to lift the panel half an inch above the floor to account for potential framing shrinkage. When installing over window bases, ensure seams aren’t in line with window corners and refrain from securing panels to the window framing. Mark switch and outlet boxes before covering them and ensure no screws are placed within 24 inches of each box. Use a rotary tool to cut out holes for these boxes and then secure the remaining panel parts. Finally, trim any projecting ends or edges around windows or doorways. Secure the panel to the framing once trimmed.
Creating Inside and Outside Corners For interior corners, position one panel’s end against the face of the adjoining wall’s panel. For external corners, ensure that the first panel’s end aligns perfectly with the studs on the neighboring wall. Overlay this exposed section with the panel from the adjacent wall, making sure the corner is entirely covered by drywall. For materials like blueboard, the ends don’t overlap at outside corners. Instead, they align precisely with the stud corner, and any gaps will be filled subsequently with plaster. To finalize outside corners, affix a metal corner bead, tailored to match the wall’s height. Trim each bead end at a 45-degree angle, setting its legs over the adjoining panel. Secure the bead using 1 ½-inch drywall nails at 10-inch intervals, ensuring the legs sit flush against the wall and the corner retains its form. Implement the same steps for the adjacent wall.
Ensuring Proper Alignment of Studs Skilled drywall professionals, like Paul Landry, anticipate that walls are constructed to be flat and straight. However, over time, particularly between the framing completion and drywall installation, studs can undergo shifts, twisting, or bowing. While minor misalignments can be masked by drywall, any deviation exceeding half an inch can produce noticeable wall surface irregularities. As a preliminary step, experienced professionals always scout for misaligned studs, employing a long straightedge positioned horizontally against the framing’s midpoint.
Upon identifying a deviating stud on an internal wall, it can be realigned using a saw and shingle. A two-thirds deep cut is made at the center of the bow’s concave edge. Applying pressure to the opposite edge aligns the stud. To maintain the stud’s adjusted position, a shingle is placed into the cut, acting as a shim. Subsequently, strapping scraps are affixed to either side of the stud to reinforce it. For external walls, it’s rare to spot an inward-bowing stud because sheathing typically keeps it stable. If such a situation arises, the only solution is to realign the stud using a power plane.
Refinements and Final Checks Once the drywall installation is completed, inspect for any screws sticking out. Drive any protruding screw heads slightly below the panel surface. Also, look for screws that might have been overly driven, tearing the paper face. Place an additional screw adjacent to any screw that has pierced through the paper. Thoroughly sweep the room, clear any lingering debris, and now the space is primed for drywall finishing.
Conclusion

In summary, hanging drywall is more than just attaching sheets to wall studs; it’s an art that demands precision, attention to detail, and an understanding of the right materials and tools. From selecting the appropriate type and thickness of drywall to meticulously measuring and cutting, each step in the process plays a pivotal role in achieving a smooth, finished look. While the task may seem daunting initially, with patience and practice, any DIY enthusiast can master it. Remember, the walls of a room serve as the canvas for your home’s aesthetic, and the drywall is the foundation of that canvas. By investing time and care into this foundational step, you lay the groundwork for a beautifully finished space. Whether you’re renovating an old space or constructing a new one, mastering the art of hanging drywall ensures a polished and professional appearance for years to come.