
Last Updated on October 16, 2023 by Pro Handyman Australia – Editorial Team
Drills are essential tools in many workshops, known for their versatility. Similarly, different types of saws cater to diverse cutting needs. When considering rotary hammer vs hammer drill, it’s vital to understand the distinct functionalities they offer. If you’re new to using a power drill, this guide will provide a brief overview of its types, including the differences between rotary hammers and hammer drills, and some tips on how to use a power drill and choose the right one. For those specifically interested in cordless options, our Cordless Drill Buying Guide offers a comprehensive look into making the best choice. Remember: Always prioritize safety and drill safely when handling any power tool.
Types of Drills: Quick Overview
There are two main types of power drills:
- Corded Drills: Offer reliable performance with constant power supply via an electric cord.
- Cordless Drills: When considering how long cordless drill batteries last, it’s evident that these tools operate on rechargeable battery packs, providing flexibility and mobility. They come in varying voltages, which correlate with their power drill and suitability for different tasks.
Choosing the Right Drill for the Job
- Light-Duty Tasks: For occasional tasks like hanging a shelf or fixing a mirror using pilot holes, a compact 8- to 10-volt cordless drill is sufficient.
- Moderate Tasks: For more demanding jobs, like installing drywall, an 18-volt cordless drill with the correct drill bit size is recommended.
- Heavy-Duty Tasks: For intensive tasks requiring pilot holes and prolonged use or heavy-duty attachments, consider a 20-volt cordless or corded drill.
Understanding the Basics and Controls
A standard drill package should ideally include:
- The power drill itself.
- A rechargeable battery.
- A plug-in charger.
For those diving into DIY tasks and wondering about tools like how to use a circular saw or what is a cordless impact driver used for, it’s worth noting the versatility of these tools. In addition to basic household tasks, the impact driver often comes in a kit that provides a few essential drill bits. These bits are used for boring holes, especially when figuring out how to drill into stucco. The kit also includes driver bits, employed for fastening or loosening screws, which should suffice for most applications.
Familiarizing with Drill Bits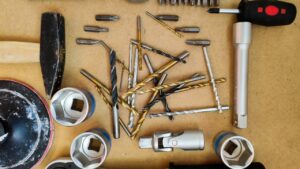
- Drill Bit: Suitable for drill holes in materials such as wood, drywall, and plaster.
- Driver Bit: Used to drive screws into tough materials with the correct drill bit.
- Drive Guide: A tubular attachment that holds long screws steady, ensuring they remain straight during the driving process.
- Insert Bit: Employed for connecting driver bits.
Mastering Power Drill Controls
- Chuck:This component is where you insert the correct drill bit size, especially when dealing with different types of drill bits. You can open or close the chuck by firmly gripping the handle while pressing the trigger switch.
- Trigger Switch: Engage this to operate the drill.
- Torque Control: This control lets you modify the drilling power or torque. There’s usually a dedicated setting for drilling holes. It’s wise not to use this setting for driving screws to avoid damaging the screw head.
- Gear Switch: This switch adjusts the drill speed. As a rule of thumb, use a lower gear for light screws and a higher one for drilling holes or driving substantial screws.
- Reverse Switch: Determines the drilling direction—clockwise for the standard mode and counter-clockwise for reverse. When this switch is centrally positioned, or set to safety, the drill remains stationary.
- Battery: This provides the necessary power to the drill.
Video on How to Use a Power Drill
In this video, we break down the essential steps and safety tips for using a power drill effectively. Whether you’re hanging a picture, assembling furniture, or diving into DIY projects, understanding the basics of a cordless drill is paramount. Join us as we cover the types of drills, drill bit selection, and hands-on techniques to ensure you’re drilling like a pro in no time. No prior experience required—just a keen interest in learning! Tune in and power up your home improvement skills.
Hands-on User Experience with Leading Drills
In the world of cordless drills, personal experiences can speak volumes about the efficiency and effectiveness of a device. Personal experiences can speak volumes about the efficiency and effectiveness of these devices. Reflecting on recent user reviews and hands-on experiences with different types of drills, especially in the cordless category, here are some of the most talked-about models and the real-life stories that users have shared about their performances:
MasterSpec 12V
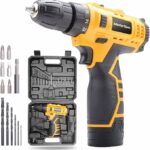
“The MasterSpec 12V surprised me with its power, especially given its compact size. Used it for my deck project, and it didn’t let me down.” – Alicia M., DIY Enthusiast.
TOPEX TX003
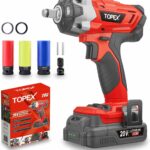
“Battery life on the TOPEX TX003 is stellar. I used it for an entire afternoon, and I didn’t need to recharge. The grip felt a little slippery though, but it’s one of the most power drills I’ve used.” – Jake L., Carpenter.
Bosch 06039D8040

“I got the Bosch 06039D8040 after reading many reviews, and it’s worth every penny. A bit on the heavier side, but as one of the most power drills in its category, it makes up for it with its performance.” – Ravi K., Home Renovator.
Each user’s experience provides a unique perspective, shedding light on both the strengths and weaknesses of these top models. But, always remember that while these reviews provide a snapshot, individual experiences with most drills may vary.
Drill-by-Drill Comparisons: Diving Deeper into Specifications
For those who enjoy getting into the nitty-gritty of product specifications, we’ve crafted a comparison table of popular hammer drill models:
| Model | Power (Watts) | Battery Life (hours) | Weight (kg) | Price ($) |
|---|---|---|---|---|
| MasterSpec 12V | 550 | 4.5 | 1.2 | 199 |
| TOPEX TX003 | 500 | 6 | 1.5 | 230 |
| Bosch 06039D8040 | 580 | 5 | 1.8 | 210 |
This table showcases the core features that many users often consider before making a purchase. The DrillMaster ProX200, for instance, is a versatile tool that might appeal to those who prioritize power in a lightweight design. In contrast, the TorqueTrend TT-450 is a clear winner in battery longevity.
Working with Drill Bits

Selecting the Right Drill Bit
Before embarking on any drilling project, it’s essential to:
- Ascertain the size and desired depth of the hole.
- When considering if you’re working with screws, it’s essential to understand the various types of bits for drills. Creating pilot holes is vital to avoid splitting the wood. Ideally, the diameter of the drill bit for this pilot hole should match the diameter of your screw, excluding its threads.
- If you’re tapping the hole—meaning you’re threading it to accommodate a bolt—it’s recommended to consult a chart to determine the correct pilot hole size for your specific bolt.
Various types of drill bits serve different purposes:
Screwdriver bits are primarily for driving screws. They don’t possess the capability to drill holes.
Twist drill bits are commonly used for drilling standard-sized holes in materials like wood and metal. If your project necessitates drilling a large hole using a twist drill bit, it’s wise to begin with a smaller bit and incrementally widen the hole. Jumping straight to a larger bit can lead to imprecise holes, cause the bit to wander, and can be time-consuming.
Forstner bits, one of the many types of wood drill bits, are designed for drilling large holes in wood. These can either penetrate the material partially or go all the way through. Additionally, they can be employed to create angled holes.
Spade bits can bore large holes in wood more efficiently than twist drill bits. Depending on the depth you need, these can create either partial or full holes.
Hole saw bits have the ability to drill even larger holes than spade bits. However, they can’t make partial cuts. The material constituting the saw bit determines whether it’s suitable for wood or metal.
Installing the Chosen Drill Bit
To fit the selected drill bit into your hand drill, you should be familiar with the keyless chuck if your drill has one:
- Start by loosening the chuck (the front black circular section of the drill). Turn it counterclockwise to expand the diameter of its clamping jaws. If you have a keyless chuck, this can typically be done by hand.
- Introduce the shank (the smooth portion) of the drill bit into these jaws. Subsequently, retighten the chuck to ensure the drill bit is firmly held in place. It’s crucial to ensure the bit is perfectly aligned and that the jaws grip the shank’s flat surfaces. If using a keyless chuck, ensure that the chuck is tightened securely to avoid the drill bit from slipping when you begin drilling. Refrain from securing the jaws around the bit’s flutes, as doing so, especially with smaller bits, might lead to breakage.
- For a quicker and sturdier chuck tightening, grasp the keyless chuck (avoiding the drill bit) and slowly use a drill in a clockwise direction. Conversely, to loosen the chuck, hold it while running the drill in a counterclockwise manner.
Configuring the Drill Settings
- When diving into the debate of hammer drill vs impact driver, it’s essential to consider power sources. When you start drilling, prioritize ensuring that the drill is powered by a sufficiently charged battery. Utilizing a partially drained battery, whether in a hammer drill or an impact driver, may result in a sluggish and inefficient drilling process.
- Familiarize yourself with the drill’s speed settings before you start drilling, usually found as a prominent switch on the drill’s upper portion. The first setting delivers low speed with high torque, predominantly suitable for driving screws into materials. On the other hand, the second setting offers high speed and reduced torque, apt for drilling operations. Typically, tasks require the high-speed setting unless you’re creating substantial or deep holes in wood using a twist bit.

- Recognize the correct drilling direction. When the drill bit points away from the user, a clockwise motion facilitates cutting or screwing into materials, while an anticlockwise motion aids in retracting the bit or unscrewing. At lower speed, you can better grasp this. Gently run the drill and observe the bit’s flutes and their cutting direction. Some other tools might have different orientations, so it’s always good to familiarize yourself with the drills you are using. Use the side buttons near the handle, just above the trigger, to alter the drilling direction. Speed adjustments can also help with control.
- Take note of the torque settings, represented by numbers encircling the drill’s chuck. These settings become critical when embedding screws. A low torque setting may halt the drill prematurely, generating a distinct clicking sound. On the other hand, more torque might cause the screw bit to lose its grip, potentially damaging the screw head. For drilling operations, always set the dial to the drill bit symbol or the lowest setting in the absence of such a symbol.
Executing the Drilling Process

Preparing Your Material
- When working with various types of power saws or drilling equipment, it’s imperative to follow certain guidelines. Ensure the material you aim to drill is firmly affixed to a robust work surface using clamps or a vice. Always make sure the work surface is stable. It’s generally advisable to place a scrap wood piece beneath the primary material. This method facilitates a neater edge when the drill penetrates through the work surface.
- Always ensure there’s adequate space below the work surface to prevent unintentional damage.
- Clearly demarcate the intended drill sites on the material. Utilizing appropriate marking techniques can aid in achieving this precision.
Drilling the Hole
- Commence the drilling procedure by gently placing the drill bit’s tip against the material. As a tip, aim to maintain the drill bit perpendicular to work surface for most operations, ensuring a straight pathway.
- Initiate the drilling process by gently pressing the trigger. Once a minor indentation is achieved, increase the speed while applying consistent power until the material is fully penetrated. Drills with higher power might make this process easier.
- After completing the drilling, ensure the drill maintains its direction and extract the bit while it’s still spinning. This action helps in clearing out any debris from the freshly drilled hole.
Assessing the Drilled Hole
Once you’ve drilled the hole, particularly if it’s intended for a fastener like bolts, screws, or rivets, ensure the screw or fastener slides into the hole with relative ease. Screws should fit smoothly without much resistance. If you encounter resistance, using the best drill attachments can be of great help. You have two potential solutions. You can either:
- Re-drill the hole using a marginally larger drill bit, or
- Ream out the edges of the existing hole. Achieve this by maneuvering the drill in a circular motion while drilling, using the original drill bit.
Post-Drilling Cleanup
Upon completing your drilling tasks:
- Detach the drill bit from the chuck and store it in its designated location.
- Store the drills and place the battery on its charging dock to ensure it has the power for next use..
- Prioritize cleanliness: Vacuum any residual chips or dust from both your workspace and the surrounding floor area.
Best Practices and Safety
Handy Tips and Tricks

- Unsure about the apt drill bit size for an anchor? Often, the anchor’s packaging provides a recommended drill bit size.
- When driving a screw into an anchor or any work surface, proceed with caution using less torque.
- Before driving a screw into wood, pre-drill a smaller hole to simplify the process.
- As a tip, if you plan to hang an item like a hook, position it on the wall and lightly mark the drill points with the drill tip before making the guide hole or inserting the anchor.
Safety Protocols for Using Power Drills
Using power drills necessitates a keen emphasis on safety:
- Protective Eyewear: Regardless of the nature of the task – be it drilling or driving bits – always shield your eyes by wearing eye protection.
- Hearing Protection: While power drills might not match the deafening roar of tools like circular saws, their typical noise level around 65 decibels can gradually impair one’s hearing. Always ensure you’re wearing hearing protection.
- Handling and Grip: Power drills, including hammer drills, have the potential to cause strain or even injure your wrist or hand if they go awry. Such incidents can arise when the drill’s torque surpasses the counteracting force you’re applying manually. It’s beneficial to opt for drills equipped with an additional bracing handle. If your drill lacks this feature, ensure a firm grip on the drill’s base handle with your free hand to counter any unexpected rotations. A common question is, “Can a hammer drill be used as a regular drill?” Knowing the answer and understanding the drill’s power capabilities can prevent accidents. In essence, when the hammer function is turned off, it can work similarly to a traditional drill.
Conclusion
Using drills, especially when pondering what is a hammer drill, requires a systematic approach. This not only extends the life of your tools but also ensures a seamless and productive work experience on your work surface. Maintaining a structured approach to drilling, from the initial setup to the final cleanup, ensures efficiency and minimizes potential errors. Always prioritize safety and cleanliness, keeping tools well-maintained and your workspace tidy. This not only extends the life of your tools, including hammer drills, but also guarantees a seamless and productive work experience.