
Last Updated on August 29, 2023 by Pro Handyman Australia – Editorial Team
Managing Wall Cracks to Ensure Successful Plastering
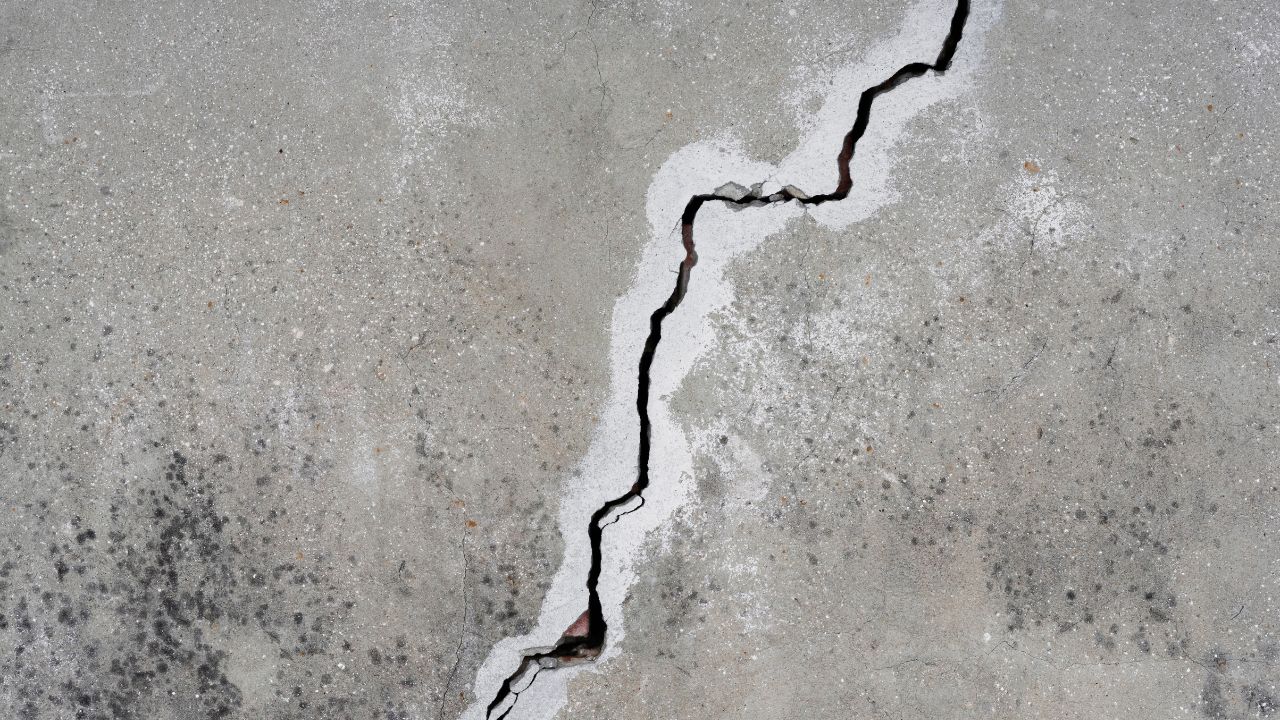
Repairing cracks in walls before commencing the plastering process is essential for achieving a flawless finish. The presence of cracks can mar the final appearance, and a proper understanding of the underlying causes is pivotal for selecting the appropriate repair approach. This article delves into the various causes of wall cracks and presents effective solutions to address them.
Understanding the Origins of Wall Cracks:
Wall and Floor Cracks: Origins and Commonality
Cracks that manifest on walls and floors can arise from a multitude of factors, though the resolutions to rectify them often exhibit a degree of commonality. Prior to embarking on the remediation journey, a comprehensive comprehension of the crack’s nature is imperative.
Identifying Causative Factors and Corresponding Solutions
Settling Foundations and Shifting Soil
Cause: Shifting soil and foundational settling can lead to cracks.
Solution: Address underlying soil issues and employ foundation repair techniques. Reinforce with flexible materials to prevent future cracks.
Temperature and Moisture Fluctuations
Cause: Temperature and moisture variations can trigger expansion and contraction, causing cracks.
Solution: Ensure proper insulation and ventilation to regulate temperature and moisture. Seal cracks with flexible sealants to accommodate movement.
Structural Load Stress
Cause: Heavy loads and inadequate structural support can result in cracks.
Solution: Strengthen structural elements, redistribute loads, and consider reinforcement with materials like steel.
Inferior Initial Workmanship
Cause: Poor construction practices or inadequate materials during initial installation.
Solution: Redo the affected area using quality materials and proper techniques. Correct underlying issues before plastering.
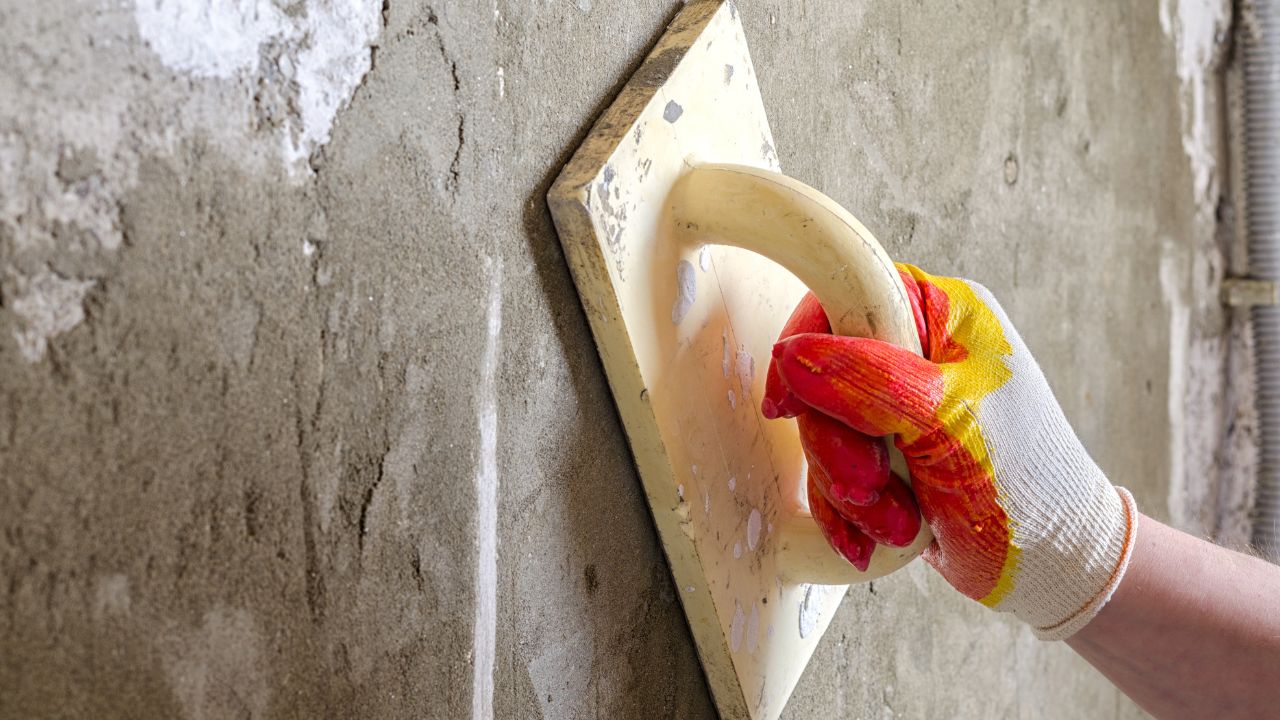
Crucial Pre-Plastering Crack Repair:
Addressing Cracked or Damaged Walls
Effectively handling damaged walls requires a methodical approach. To assist you in navigating this complex task, we’ve compiled a comprehensive guide outlining common types of issues and the corresponding solutions for each scenario. By embracing these insights, you can confidently address cracks and damage, ensuring a seamless and enduring result for your walls.
Tackling Cracked Caulk:
Problem: Cracking caulk can arise due to various factors
- Low-Quality Caulk: Ensure the use of high-quality permanent acrylic sealant to prevent caulk from cracking.
- Overapplication: Caulk is designed for gaps of 2-3 mm. Attempting to use it as filler for larger areas can lead to cracks.
- Premature Painting: Applying paint before the caulk is completely dry (not just surface dry) can result in cracking.
Solution: In cases of cracked caulk, the optimal solution involves removing the cracked caulk and reapplying it correctly. While there’s no shortcut, adhering to the correct procedure yields the best results.
Addressing Dampness:
Problem: Dampness can lead to various complications. Identifying the source of dampness and rectifying it is crucial to prevent recurrent issues. Damp-related problems include adhesion failure, blistering, flaking, mold growth, and staining.
Solution:
- Removing Unsound Coatings: Start by eliminating unsound coatings from affected areas.
- Treating Mold: Combat mold growth by using Weathershield Multi-Surface Fungicidal Wash. Allow the solution to stick to the surface for approximately 24 hours, then scrub with a non-metallic stiff brush or nylon abrasive pad. Rinse to remove residues and ensure thorough drying. If needed, repeat the treatment.
- Testing Moisture Levels: Before proceeding, allow surfaces to dry completely. If uncertain, employ a moisture meter to assess moisture levels.
- Blocking Staining: Address staining concerns with Dulux Trade Stain Block Primer as required.
- Ensuring Dry Surfaces: When redecorating, ensure surfaces are entirely dry to prevent further complications.
Conquering Mold Infestation:
Problem: Mold thrives in environments with high humidity, inadequate ventilation, and high moisture content on surfaces. Left unchecked, mold can deteriorate paint finishes.
Solution:
- Treatment: Utilize Weathershield Multi-Surface Fungicidal Wash on affected areas. Allow it to rest for 24 hours, then scrub and rinse to remove residues. Thoroughly dry the area.
- Preventive Measure: Apply two coats of Dulux Trade Mouldshield Fungicidal Eggshell to minimize the risk of mold recurrence.
Battling Blistering Woes:
Problem: Blistering is commonly triggered by trapped moisture and heat, causing paint to lift and crack. This results from painting surfaces without adequate drying time.
Solution:
- Prepare the Surface: Carefully scrape off blistered paint to establish a solid edge. Lightly feather using abrasive paper and remove dust.
- Spot-Prime and Seal: Spot-prime with Primer Sealer and employ Dulux Trade Stain Block+ on vulnerable surfaces. Fill in bare spots.
- Repainting Process: Start with a thinned first coat of water-based Dulux Trade Diamond Eggshell on primed areas. Follow with one or two full coats. Ensure the surface is clean, dry, and dust-free before each application.
Confronting Crazed Paint:
Problem: Crazed paint can stem from applying matt paint over silk, excessive paint thickness, or rapid temperature changes during drying.
Solution:
To combat crazed paint:
Remedial Steps: If caused by matt paint over silk or excessive thickness, sand down the affected areas. Use a roller to apply two thin coats of paint.
Quick Temperature Changes: Address crazing caused by temperature changes by applying gentle heat during drying.
Severe Crazing: In extreme cases, consider stripping the wall, applying lining paper, and repainting for comprehensive restoration.
Ensuring Lasting Results through Methodical Crack Repair
As the preparations for plastering commence, addressing existing cracks becomes paramount. Neglecting this critical step could result in the reappearance of cracks, undermining the quality of the newly applied finish.
It is imperative to repair each crack meticulously and to utilize appropriate materials and techniques to prevent future recurrence. When plastering over repaired areas, the surface will be perfectly primed for an impeccable, lasting finish.
Fixing Superficial Cracks in Walls: A Comprehensive Guide
When it comes to the walls in our spaces, it’s not uncommon to encounter seemingly trivial cracks. These can stem from various sources, ranging from mortar shrinkage to plaster peeling. Despite their superficial appearance, addressing these cracks is pivotal before embarking on painting or plastering endeavors. Let’s explore the ways to effectively rectify these issues and ensure a smooth surface for your finishing touches.
Tackling Shrinkage Cracks:
In most cases, cracks tend to appear as a result of the natural shrinkage of mortar composed of lime and cement during the drying process. These cracks often resemble a network of lines stemming from a central point. While these cracks are superficial and stationary, it’s still advisable to address them before proceeding with plastering or painting. The steps to handle these cracks are as follows:
Examine the Crack: Carefully assess the extent of the shrinkage crack to ensure it’s indeed a superficial issue and doesn’t conceal any underlying concerns.
Gather Materials: Acquire the same type of plaster that was used during construction, ensuring a seamless integration.
Apply Plaster: Using a putty knife, gently fill the crack with the plaster mixture. Make sure that the mixture is smooth enough to match the existing surface.
By taking these simple yet effective steps, you can effortlessly mend shrinkage cracks, creating a pristine canvas for your next stages of wall enhancement.
Addressing Plaster Peeling Cracks:
“Spider-web cracks” on plastered surfaces are another common occurrence. However, it’s essential to discern whether these superficial blemishes are indicative of more significant structural issues, such as the potential detachment of a larger plaster area. Check out the procedure below on how to resolve this issue.
Conduct a Visual Inspection: Carefully examine the crack and its surroundings. Look for any signs of movement or separation around the crack.
Apply Pressure Test: Gently apply pressure on the crack using your fingers. If the plaster shifts or moves, it might indicate a larger underlying problem that requires more extensive repair.
Assess the Scope: If movement or detachment is confirmed, the issue likely goes beyond surface imperfections. Under this circumstance, the best option to go for is the reconstruction of the plaster in the affected area.
Repairing Structural Cracks in Walls: A Definitive Guide
Structural cracks on walls present a more intricate challenge, demanding specialized attention before embarking on painting or plastering endeavors. Unlike superficial cracks, which may seem inconsequential, these active cracks often stem from underlying issues within the wall’s composition or the detachment of plasterboard panels. To ensure a flawless finish, it’s imperative to address these cracks promptly and effectively. This section explores the intricacies of managing structural cracks and offers comprehensive solutions to tackle them.
Deciphering Active Cracks:
The Nature of Active Cracks: Active cracks are characterized by their vertical orientation, stemming from either internal fractures within the wall or panel detachment in plasterboard structures. These cracks can sometimes mirror the brick pattern, unveiling the root cause of the issue.
Recognizing Structural Implications: Unlike superficial cracks, structural cracks typically span both sides of the wall and are perpetually in motion. Neglecting these cracks during painting or plastering can lead to their reappearance over time.
Addressing Detached Panel Cracks:
Restoring Wall Continuity: When a crack arises from the detachment of a panel in a drywall structure, rectification involves reestablishing the static continuity of the wall. Secure the loose panel back into the metal structure using screws.
Tackling Brick-Level Breakages: Cracks caused by breakages at the brick level require more extensive measures. Extensive masonry work is often necessary to halt their movement effectively.
Implementing the Mesh Bridge: Regardless of the crack’s origin, the Mesh Bridge technique offers a durable solution. This method ensures that the crack remains inconspicuous in the finished surface. Here’s how it works:
Narrow Mesh Application: Fix a fiberglass or polyester mesh along the crack using a fiber-reinforced plaster. Allow it to dry before proceeding.
Wider Mesh Application: For larger cracks, apply a narrower mesh (around 6 cm) along the crack with fibrous plaster. After it dries, overlay a wider mesh (about 30 cm) to reinforce the area.
Comprehensive Coverage: When dealing with numerous cracks, adopt a wall-wide approach. Start by applying a narrow mesh along each crack. Then, cover the entire wall using 100 cm-wide mesh bands, placed side by side without overlapping.
Implementing the Mesh Bridge technique, particularly in cases of larger cracks, proves to be highly effective. Utilizing the right plaster, such as the Anti-Crack Plaster, further enhances the success rate of this approach.
Managing structural cracks necessitates a nuanced approach and an understanding of the underlying causes. Sticking to this procedure can guarantee the lasting integrity and aesthetic appeal of your walls as you proceed with painting and plastering endeavors.
Repairing Cracks in Floors: A Comprehensive Guide

Addressing cracks in floors entails understanding the diverse facets of the issue while embracing unified solutions. Whether working with new screeds or existing tiles, the process remains consistent. Plastering a floor involves a careful approach, particularly when dealing with new screeds or tiled surfaces. The need to cure new screeds adequately and counteract the potential for crack formation is paramount. This section delves into the nuances of repairing floor cracks and offers strategic methods to achieve a seamless finish.
Navigating New Screeds:
Critical Curing Period: With new screeds, allowing a minimum curing period of three weeks before plaster application is essential. This phase accommodates significant withdrawals that can influence crack formation.
Repair Methodology: Repairing cracks in new screeds mirrors the process for walls. Follow these steps:
Narrow Mesh Application: Apply a narrow mesh along the crack, affixing it using a fibrous plaster like our Anticrack.
Wider Mesh Integration: Utilize 100 cm-wide mesh bands, arranging them without overlap to span the entire floor surface.
Final Coat Application: If the floor surface comprises new screeds, fix the wider mesh bands using the chosen final finish plaster. For tiled or marble-covered floors, use a Gap Levelling Plaster (GLP), which is a highly fibrous and adhesive plaster such as to secure the mesh.
Tackling Tiled Floor Cracks:
Hidden Cracks in Tiled Floors: Tiled floors frequently harbor concealed cracks that align along tile edges. These cracks often become apparent only after plaster application is complete.
Mesh Application Solution: To preempt such issues, applying mesh to all tiled floors before plastering is advised. This precaution is particularly crucial for elevated floors, which experience greater stability.
Mesh and Plaster Selection:
Optimal Mesh Choice: Similar to wall repairs, select a fiberglass or polyester mesh weighing around 120 grams per square meter.
Strategic Mesh Placement: Use one-meter-wide mesh bands, positioned side by side without overlap. Place the mesh over tiles and secure it with the initial coat of plaster.
Effective Plaster Integration: For incorporating the mesh and adhering to tiles, our Gap Levelling Plaster (GLP) is the ideal choice.
Managing Expansion Joints:
While ensuring crack-free surfaces, remember to respect expansion joints. These joints might not be concealed effectively beneath a mesh. Position the mesh around the expansion joint, leaving it uncovered by both mesh and plaster.
In both wall and floor applications, meticulous attention to detail and a well-executed mesh-plaster integration can help you achieve a seamless and durable finish.
Addressing Cracks Requiring Major Masonry or Reconstruction Work
In the realm of crack remediation, certain scenarios demand more than just conventional repairs. There are instances where the only viable solution is to embark on extensive masonry or reconstruction endeavors. This section delves into such complex situations and provides useful information as to how to deal with them effectively.
Unavoidable Reconstruction:
Exceptional Cases: In certain situations, cracks defy conventional fixes, necessitating a comprehensive approach such as reconstruction.
Illustrative Example: Consider the case of a crack on a fireplace hood. This crack emerged due to the differing expansion rates of the metallic hood and the attached masonry structure. The discrepancy in thermal responses led to visible cracks in the brickwork where it leaned against the hood.
Unearthing a Solution:
Understanding the Challenge: When dealing with cracks caused by contrasting thermal expansion, conventional approaches might prove futile.
Innovative Remediation: The solution, in this case, involved the strategic application of plasterboard over the fireplace hood. This step was complemented by the use of a flexible adhesive material for optimal adherence.
Layered Approach: With the plasterboard securely in place, the next step was the application of our Venetian Plaster. This process helped achieve a seamless and aesthetically pleasing finish.
While confronting cracks demanding major masonry or reconstruction work can be daunting, innovative solutions can yield impressive results.
Mastery in Drywall Crack Repair: A Comprehensive Guide
Efficiently addressing cracks in drywall requires precision and the right techniques. This section offers an in-depth overview of the steps needed to expertly mend drywall cracks, ensuring a seamless and professional outcome. By following these guidelines, you can confidently handle drywall cracks and achieve a polished finish that blends seamlessly with the surrounding surface.
Equipping Yourself with the Right Materials:
Optimal Joint Compound Selection: For crack repair, you have two options: pre-mixed joint compound or “setting-type” joint compound available in powder form. While setting-type compound dries quickly and is favored by professionals, pre-mixed joint compound is recommended for beginners due to its ease of application and sanding.
Executing Precise Crack Preparation:
Creating a “V” Notch: Carve a V-notch that’s 1/4 to 1/8 inch (0.64 to 0.32 cm) along the crack. This notch, resembling the letter “V,” assists in securing the compound during application.
Thorough Dust Removal: Brush out the dust from the crack using a paintbrush or a hand vacuum cleaner. A clean surface ensures optimal compound adhesion.
Application and Layering of Joint Compound:
Strategic Compound Application: Apply coats of joint compound over the crack, using a 3 to 4-inch (7.6 to 10.2 cm) putty knife. Allow each coat to dry completely before proceeding. Generally, three coats are sufficient to fill the crack. If the crack exceeds 1/4 inch (0.64 cm) in depth, embed mesh or paper tape into the first layer to ensure a secure seal.
Drying and Sanding: Drying times vary based on the type of compound used. Setting-type joint compound takes approximately 20 minutes per coat, while premixed compound’s first coat can take up to 24 hours to dry. Once dry, use medium-grit sandpaper and a sanding block to smooth the compound. Always make sure you’re wearing a dust mask when sanding.
Achieving a Flawless Finish:
Priming and Painting: To finalize the repair, prime the patched area with latex primer before applying wall paint. This step is essential for seamless blending with the rest of the wall. If using a paint and primer in one, a couple of coats directly on the affected area are sufficient.
Expert Insights: If desired, sand in between coats to reduce the extent of sanding required at the end. Opt for 80-grit sandpaper for larger imperfections and 120-grit for finishing touches.
Effective Plaster Crack Repair Products: A Comprehensive Guide
When embarking on the task of repairing cracks before painting or plastering walls, selecting the right products is paramount to ensure a seamless and lasting finish. This section sheds light on the essential crack repair products that are highly recommended for achieving professional results. By incorporating these specialized solutions, you can confidently address cracks and enhance the structural integrity of your surfaces.
The Recommended Crack Repair Products:
AntiCrack: A Versatile Solution for Long-Lasting Surfaces
Flexibility and Durability: AntiCrack is a flexible plaster designed for both interior and exterior use. It effectively minimizes the risk of cracks on drywall and other plasters, significantly enhancing impact resistance and durability.
Vital for Restorations: This product is particularly essential for drywall installations and the restoration of old plasters. It serves as an ideal substrate for lime and gypsum plasters, offering a solid foundation for subsequent layers.
Structural Crack Repair: For repairing structural cracks in walls before painting or plastering, AntiCrack proves its versatility. Begin by applying a narrow fiberglass mesh tape (approximately 6 cm) along the crack. Secure the mesh to the surface using a layer of AntiCrack. As the plaster dries, overlay a wider mesh tape (around 30 cm) and fix it using AntiCrack.
Gap Levelling Plaster (GLP): Unmatched Adhesion and Versatility
Superior Adhesion: Gap Levelling Plaster is revered for its exceptional adhesion capacity. It doesn’t succumb to shrinking upon drying, ensuring a solid and enduring bond.
Tile Gap Filling: Employ GLP to effectively fill gaps between tiles in both wall and floor surfaces, acting as a preparatory step before plaster application.
Optimal for Tiled Surfaces: Thanks to its adhesive prowess, GLP serves as an ideal first coat for plastering on tiles and marble surfaces, eliminating the need for prior sanding.
Crack Repair for Tiled Floors: Cover the entire tiled floor with 1-meter-wide fiberglass mesh tape, placing the bands side by side without overlap. Secure them to the surface using GLP. Once dry, apply your desired plaster over the prepared surface.
By integrating these advanced crack repair products into your restoration and plastering endeavors, you’re poised to achieve remarkable outcomes. Investing in AntiCrack and Gap Leveling Plaster ensures that your surfaces boast both resilience and aesthetic excellence, setting a new standard for your projects.
FAQ: Repairing Cracks in Walls Before Painting or Plastering
Navigating the intricacies of crack repair before painting or plastering can be a daunting task. This section provides comprehensive answers to frequently asked questions, offering insightful guidance on how to effectively address cracks and achieve impeccable results.
Remedying Deep Cracks for Painting:
Question: How should I address deep cracks in walls before painting?
Answer: If the crack stems from the detachment of a drywall panel, begin by reattaching the loose panel to the metal structure using screws. Next, employ a fiberglass mesh in conjunction with a fiber-reinforced plaster, such as our Anticrack. After application, allow it to dry before repainting or plastering. This method is equally effective for brick walls.
Tackling Large Cracks with Precision:
Question: What’s the strategy for repairing large cracks before painting?
Answer: For cracks caused by detached drywall panels, the process involves securing the panel back onto the metal structure with screws. Subsequently, apply a narrow fiberglass mesh tape (approximately 6 cm) along the crack, utilizing a fibrous plaster. Once the plaster sets, overlay a wider mesh band (around 30 cm) and allow it to dry. This meticulous approach, applicable to brick walls as well, culminates in a finished wall ready for painting or plastering.
Optimal Crack Repair Products:
Question: What are the recommended products for crack repair?
Answer: Anticrack and Gap Levelling Plaster are exceptional choices for plaster crack repair. Anticrack serves as a versatile solution for structural crack repair. Start by applying a narrow fiberglass mesh tape (approximately 6 cm) along the crack. Secure the mesh to the surface using a layer of Anticrack, creating a robust foundation for the finishing layers.
Expertly Addressing Tiled Floor Cracks:
Question: How do I approach crack repair on a tiled floor?
Answer: Begin by covering the entire tiled floor with 1-meter-wide fiberglass mesh tape, ensuring bands are placed side by side without overlap. Secure the mesh using our Gap Levelling Plaster (GLP), which offers superior adhesion. Once the GLP sets, proceed to apply your chosen plaster for a seamless and flawless outcome.
Mastering Floor Crack Repair:
Question: How do I handle crack repair on a floor?
Answer: Whether it’s a new screed or an existing plastered floor, the methodology remains consistent. Apply a narrow mesh along the crack, securing it to the surface with a fibrous plaster. Extend your approach by using 100 cm-wide mesh bands, positioning them without overlap to cover the entire floor. Fix the mesh bands to the floor with plaster, setting the stage for a successful and lasting repair.
By assimilating these insights into your crack repair endeavors, you’re equipped to achieve impeccable results and elevate the overall quality of your painting and plastering projects.